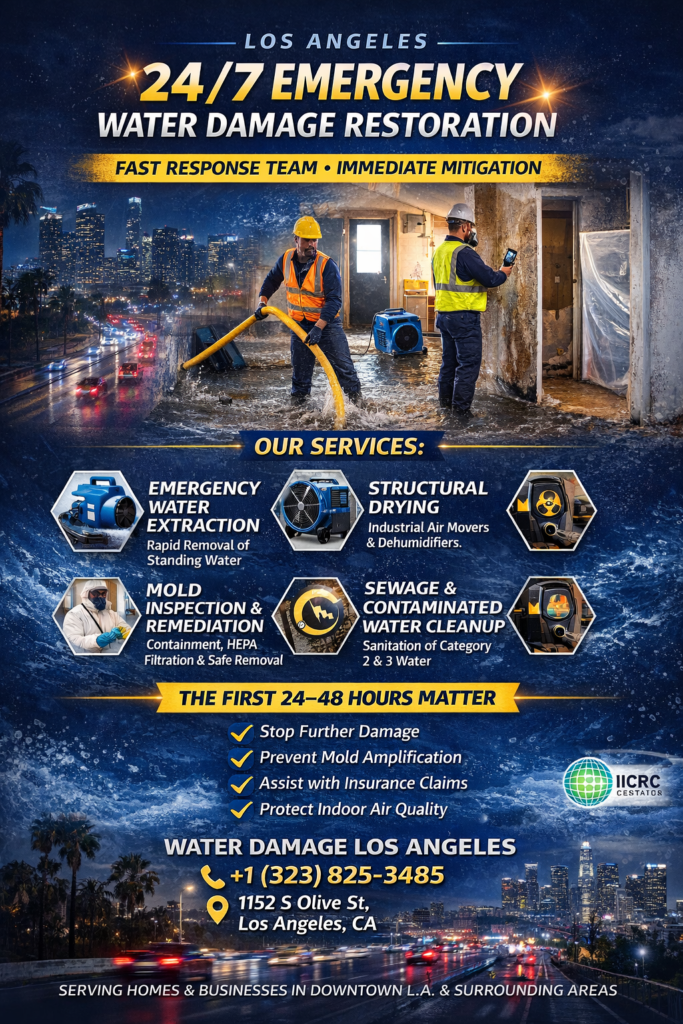
Water damage restoration in Los Angeles requires immediate action, technical precision, and compliance with industry drying standards. In dense urban environments like Downtown LA, water intrusion from burst pipes, slab leaks, roof failures, or appliance overflows can quickly escalate into structural deterioration and mold amplification within 24–48 hours.
Whether the issue affects a residential condo, commercial office, or multi-unit property, rapid mitigation reduces repair costs and protects indoor air quality. Professional restoration teams use commercial extraction systems, moisture mapping tools, and calibrated dehumidification equipment to return building materials to pre-loss condition safely.
Call Now – (323) 825-3485
Standing water must be removed before structural absorption spreads.
Emergency water extraction services in Los Angeles reduce secondary damage such as warped flooring, drywall swelling, and electrical risk.
After extraction, controlled drying prevents microbial growth and hidden moisture pockets.
Structural drying in Los Angeles properties typically ranges from 3–5 days depending on material saturation and humidity levels.
If moisture remains untreated, mold amplification can begin rapidly.
Sewage cleanup in Los Angeles requires Category 2 & 3 water sanitation protocols to eliminate bacteria and pathogens safely.
Water damage should be mitigated within the first 24 hours. Delays increase structural absorption and mold growth risk, leading to higher repair costs and extended restoration timelines.
Most policies cover sudden and accidental water damage (e.g., burst pipes). Gradual leaks or neglect may not qualify. Proper documentation from restoration professionals improves claim approval likelihood.
Typical drying takes 3–5 days. Severe saturation or high humidity may extend the process. Moisture readings determine completion—not visual dryness.
• Immediate response reduces total repair costs
• Professional drying prevents mold amplification
• Insurance documentation supports smoother claims
• Urban LA properties require fast dispatch capability
Water damage restoration in Los Angeles is a time-sensitive process that demands certified mitigation, precise drying, and thorough sanitation.
Water Damage Los Angeles
📞 (323) 825-3485
📍 1152 S Olive Street, Los Angeles, CA 90015
Serving Downtown Los Angeles and surrounding communities.
You can test for mold in your house by combining a visual moisture check with targeted sampling. A mold inspection typically starts with finding water intrusion, musty odors, and visible growth, then confirming conditions with tools like moisture meters and thermal imaging. Lab-tested air or surface samples help identify mold types and spore levels.
DIY kits can show that mold exists, but they often can’t pinpoint the moisture source, scope, or whether spores are elevated compared to outdoors. A mold inspection pro is more likely to find hidden reservoirs and document conditions for landlords, buyers, sellers, or insurance conversations.
| Option | Best for | Pros | Limits |
|---|---|---|---|
| DIY petri dish kit | Curiosity checks | Cheap, fast | Not diagnostic; false alarms common |
| DIY swab test | Testing a visible spot | Simple sampling | Doesn’t measure airborne risk or source |
| Professional mold inspection and testing | Whole-home assessment | Finds moisture source, hidden growth, actionable plan | Higher mold inspection cost |
Call a mold specialist if you smell musty odors, see repeated condensation, had a leak, notice warped drywall, or have symptoms that improve when you leave the house. In humid coastal areas, searches like mold inspection Long Beach, mold inspection Los Angeles, and mold inspection Santa Monica are common because moisture issues can be persistent.
During a mold inspection, the inspector looks for moisture problems, visible growth, and conditions that support mold. They may use moisture meters, thermal imaging, and hygrometers, then take air and/or surface samples for lab testing. You’ll usually receive a report outlining findings, likely causes, and next steps.
Companies branded around testing, such as Mold Inspection Sciences or similar providers, often emphasize standardized sampling, lab analysis, and documented moisture diagnostics. Regardless of brand, prioritize clear methodology, transparent pricing, and a report that identifies the moisture source—not just a spore count.
A mold inspector typically charges based on home size, inspection depth, and how many samples go to the lab. Mold inspection cost often increases when air samples are taken in multiple rooms or when advanced moisture diagnostics are needed. In many cases, you’ll pay a base inspection fee plus per-sample lab fees.
| Service | Typical range | What affects price most |
|---|---|---|
| Visual mold inspection only | $200–$500 | Size, travel, complexity |
| Mold inspection and testing (air + surface) | $400–$900 | Number of samples, lab fees |
| Larger homes or extensive sampling | $900–$1,500+ | Multiple zones, HVAC testing |
A free mold inspection is often a marketing offer from a remediation company that intends to perform the cleanup. It can be useful for a quick opinion, but it may not be impartial. If you want a neutral assessment, consider an independent inspector—especially for real estate decisions.
In urgent situations like an active leak or visible growth, a free evaluation may help you triage. To reduce bias, request photos, moisture readings, and a written scope, and compare it with another estimate or an independent mold inspection Los Angeles provider.
A mold inspection is worth it when you need to confirm hidden mold, locate the moisture source, or document conditions for a purchase, sale, tenant issue, or recurring health complaints. It’s also valuable after water damage to verify whether mold growth is likely. If you already see obvious mold, the inspection helps define scope.
If you’re searching mold inspection near long beach, ca, mold inspection huntington beach, or mold testing Orange County, humidity and marine layers can increase condensation and hidden moisture. In those conditions, inspections that include moisture mapping and targeted air sampling can be more useful than visual checks alone.
| Option | Best for | Pros | Cons |
|---|---|---|---|
| Independent mold inspector | Neutral diagnosis | Less conflict of interest, documentation-focused | Separate cost from remediation |
| Remediation company inspection | Fast path to cleanup | May bundle services, quicker scheduling | Can be sales-driven |
Look for clear sampling plans, transparent mold inspection price, and strong moisture diagnostics. A mold specialist Los Angeles should explain what caused the problem and how to prevent recurrence.
Ask whether the inspection includes humidity and ventilation assessment, especially near windows, exterior walls, and bathrooms where condensation is common.
Confirm the inspector checks coastal moisture patterns, window condensation, and HVAC performance, not just visible mold.
mold inspection woodland Hills, mold inspection pasadena, mold inspection santa clarita, mold inspection orange county, mold inspection sciences los angeles
You can test for mold in your house by inspecting for moisture and visible growth, then using tools like moisture meters and thermal imaging to find hidden dampness. If confirmation is needed, take air or surface samples and send them to a lab. Testing is most useful when paired with finding the moisture source.
A mold inspector usually charges a base fee plus additional lab fees for samples. Typical mold inspection cost ranges from about $200–$500 for visual-only inspections and $400–$900 for inspections that include air and surface testing. Larger homes or extensive sampling can cost $900–$1,500+.
Mold inspection is worth it when you suspect hidden mold, have recurring musty odors, experienced water damage, or need documentation for a real estate transaction. It helps identify the moisture source and the scope so you can plan repairs and remediation correctly. It’s less valuable for a small, obvious spot with a known cause.
During a mold inspection, the inspector checks for water intrusion and mold-friendly conditions, measures moisture, and may use thermal imaging to find hidden dampness. If needed, they collect air or surface samples for lab analysis. You’ll typically receive a report with findings, photos, and recommended next steps.
Filing water damage insurance claims poses challenges if you delay reporting, don’t document thoroughly, or misunderstand your policy. Quick action is key; you should document the damage with photos and videos, and mitigate further damage by shutting off water sources. Be cautious of accepting the first settlement offer, as it’s often low. DIY repairs should wait until an adjuster assesses the damage. Understanding these details helps avoid pitfalls and can lead to smoother claim processes. Explore further insights ahead.

When you delay filing a water damage insurance claim, you risk jeopardizing the approval process since most insurance policies have strict deadlines for reporting damage.
Delaying the claim process can lead to complications, as insurance companies may deny claims if they perceive negligence in promptly reporting the damage. Acting swiftly after discovering water issues is vital to guarantee a successful insurance claim.
By taking immediate action, you increase your chances of receiving fair compensation and prevent further financial loss. Remember, approximately 95% of leak detections are linked to insurance claims, underscoring the importance of quick response. Additionally, prompt incident reporting is crucial to avoid jeopardizing claims and prevent further issues.
Keep all communications with your insurer in writing, ensuring there’s a clear record of your proactive efforts to mitigate the situation and secure your claim’s success.
When dealing with water damage insurance claims, capturing thorough evidence is essential to your success.
You should take clear, detailed photos and videos of the affected areas and any damaged belongings, like furniture and electronics, which will strengthen your claim considerably.
Organizing these records meticulously, including identifying the water damage source and dating all documentation, guarantees you present a credible and well-supported claim. Additionally, involving professionals from flood damage restoration services can help ensure that your documentation meets insurance requirements.
Though often overlooked, capturing detailed evidence is essential for strengthening your water damage insurance claim. To avoid insufficient documentation, document the damage meticulously by taking detailed photographs and videos of all affected areas, including walls, floors, and ceilings.
It’s vital to also capture images of damaged belongings like furniture and electronics. This visual proof can make a significant difference in your claim’s outcome. Identifying the source of the water damage, if possible, adds credibility to your claim.
Dating all documentation provides a clear timeline, reinforcing your case when presented to the insurance company. Without these steps, you risk claim denial or reduced compensation.
Properly organizing your damage records is essential to ensuring a strong water damage insurance claim. Start by thoroughly documenting the affected areas with clear photographs and videos, capturing every detail of the damage. This documentation is important for supporting your insurance claims and demonstrating the extent of your loss.
Create a detailed inventory of all damaged items, noting their approximate values and descriptions. This helps substantiate your claim and illustrates the financial impact. Don’t forget to document areas like walls, ceilings, and personal belongings, as missing these can weaken your claim.
Date all your documentation, including photos and lists, to establish a clear timeline. Keep receipts for repairs, cleanup, and temporary accommodations, as these are crucial for proving expenses incurred.
When water damage strikes, you need to act quickly to prevent further issues and secure your insurance claim.
Immediate actions, like shutting off the water supply and using fans and dehumidifiers, are essential in protecting your home and meeting your policy requirements.
Hiring professional restoration services not only helps in effective mitigation but also provides valuable documentation that supports your claim. Additionally, a quick response is critical in minimizing damages and ensuring a successful restoration process.
Taking immediate action in the wake of water damage is essential to safeguarding your home and ensuring a successful insurance claim. Quick responses can prevent extensive damage and demonstrate your commitment to minimize losses.
Here are three immediate action strategies to mitigate damage and bolster your insurance claims:
Document each action with photos and notes. This evidence supports your claims and shows that you’ve met your policy obligations, reducing the risk of reduced payouts or denials.
Although it might seem tempting to handle water damage on your own, enlisting the services of a professional restoration company can be invaluable.
These experts guarantee proper mitigation, effectively reducing the risk of long-term issues like mold growth or structural damage. They use advanced tools to detect hidden moisture that you might overlook.
Insurance policies often require immediate steps to mitigate damage, and failing to act promptly can lead to reduced claim payouts or even denial.
Professional restorers not only manage water extraction and drying but also document damage thoroughly, providing essential evidence for your insurance claims.
After recognizing the benefits of professional restoration, it’s vital to understand the importance of preventing further damage through immediate action. Ignoring this significant step can lead to reduced claim payouts or outright denial.
Here’s what you need to do:
Neglecting these steps can impact your overall compensation.
When dealing with water damage, it’s vital not to overlook hidden damage, as it can lead to serious long-term issues like mold growth and structural instability.
Overlooking hidden damage is a common mistake in insurance claims. Many homeowners focus only on what they can see, missing concealed moisture that can wreak havoc later. Documenting all visible and suspected hidden damage is essential.
You should consider hiring professional restoration experts who use advanced moisture detection tools to uncover what’s lurking beneath the surface. Approximately 30% of homeowners miss this step, affecting their claims.
If hidden damage isn’t accounted for, you might end up with inadequate compensation and lingering issues. Thorough inspections guarantee your insurance claim covers the true extent of the damage.

Misunderstanding insurance policies is a common hurdle many homeowners face when dealing with water damage claims. You might think all water damage is covered, but that’s not always true. Policies can have exclusions for things like gradual leaks or floods.
To avoid surprises, follow these steps:
Although it might be tempting to start fixing things right away, it’s crucial to hold off on DIY repairs until an insurance adjuster has evaluated the damage.
Jumping into repairs can jeopardize your claim, as the insurance company needs to see the full extent of the damage. Insurance policies often require you to preserve the original condition until the adjuster can document it.
Premature repairs may complicate the claims process and lead to further damage or flawed fixes, reducing your claim’s value. Instead, focus on documenting the damage thoroughly with photographs and videos before attempting any repairs.
This evidence supports your claim by showing the condition beforehand. Engaging a professional water damage restoration company can also guarantee proper repairs and provide necessary documentation.
It’s tempting to accept the first settlement offer from your insurance company, but doing so without question can leave you short-changed. Insurance companies often present low initial offers, underestimating the damage to minimize payouts.
To guarantee you receive adequate compensation, consider the following:
You’ve navigated the common pitfalls of filing water damage insurance claims: don’t delay your claim, document thoroughly, mitigate damage, check for hidden issues, understand your policy, avoid DIY repairs before assessment, and question the first settlement offer. By avoiding these missteps, you’ll guarantee a smoother claims process, maximize your settlement, and protect your investment. Remember, taking proactive steps now saves you time, stress, and money later, guaranteeing your claims process is as efficient as possible.
For identifying hidden flood damage, check for water stains, wall and ceiling discoloration, and peeling paint, which indicate trapped moisture. Use thermal imaging and moisture meters for a precise assessment of hidden issues. Watch for structural signs like warped floors and uneven surfaces. Musty odors suggest mold, and electrical inspections are essential for safety. Document all findings for restoration and insurance claims. Discover how to effectively combat these challenges by exploring further today.

Although flood damage can sometimes be glaring, identifying the more subtle signs is essential for preventing further issues.
You’ll want to conduct a thorough water damage assessment to spot hidden moisture that may lead to mold growth. Look for water stains or discoloration on walls and ceilings, as these are signs of water seepage.
Don’t ignore peeling or bubbling paint, which indicates trapped moisture. Warping or buckling floors suggest underlying structural damage from prolonged exposure to water.
Musty odors often hint at hidden mold, while increased pest activity could mean there’s moisture lurking.
Addressing these subtle signs early on is vital for effective restoration and preventing visible damage from escalating. Additionally, a quick response is critical in minimizing damages to protect your property from potential flood-related issues. Stay vigilant to protect your property from potential flood-related issues.
When tackling flood damage assessments, leveraging advanced tools can make a notable difference in uncovering hidden problems.
Thermal imaging cameras are invaluable for detecting temperature variations that reveal hidden moisture behind walls and ceilings. This insight is vital for a thorough water damage assessment report.
Moisture meters, whether pin-type or pinless, measure moisture levels in different materials, identifying affected areas. These tools help document issues extensively, aiding in the restoration process and making insurance claims smoother.
Early detection of hidden issues using these advanced tools can meaningfully cut repair costs and prevent health risks.
As you explore the aftermath of a flood, recognizing the impact of hidden moisture becomes essential to safeguarding your property. Hidden moisture can lead to serious structural damage over time.
Materials like wood and drywall weaken if not properly dried and restored. Mold growth, a result of hidden moisture, poses health risks, especially respiratory issues and allergies.
To assess the extent of the damage, employ the following:
Act swiftly to guarantee effective damage restoration and maintain your property’s integrity.

You need to act quickly to identify moisture sources after a flood, as mold and mildew can thrive within just 24 to 48 hours.
Pay special attention to areas with high humidity, like basements, since they’re prone to mold growth and might require specific remediation.
Understanding the health risks associated with mold, including potential respiratory issues, is essential for ensuring a safe environment for everyone, especially those with allergies or asthma.
How do you effectively combat the sneaky threat of mold and mildew in your home? Start by identifying moisture sources, as mold growth thrives in damp conditions.
Moisture can come from hidden water leaks in roofs, plumbing, or appliances, and even groundwater intrusion during floods.
To prevent this, focus on three key areas:
When evaluating mold and mildew development in your home, it’s vital to understand the health risks they pose. Water damage can cause mold growth within 24 to 48 hours, leading to respiratory problems and allergic reactions.
High moisture levels in various areas, especially where humidity exceeds 60%, should be closely monitored. Conducting a visual inspection helps assess the damage, looking for signs like discoloration or a musty odor. Identifying the source helps prevent further issues.
Certain molds, such as black mold, produce mycotoxins, posing severe health risks, especially to vulnerable groups. Creating a restoration plan is important. Control moisture levels, repair leaks promptly, and guarantee proper ventilation to effectively mitigate mold-related health concerns after flood damage.

Flood damage can lead to short circuits, fires, or electrocution. You should always seek professional assistance for thorough evaluations. As you file an insurance claim, remember that damage to your property can stem from the source of the water, causing structural weaknesses and extensive damage.
Moisture readings can reveal hidden issues, while contaminated water adds further risk.
When evaluating long-term structural integrity after a flood, it’s essential to identify hidden damage that might compromise your building’s safety.
You should closely examine the foundation for any signs of instability, as even small issues can escalate into significant risks.
How can you guarantee your home remains safe after a flood?
Begin by recognizing hidden structural damage that can threaten your home’s integrity. Conduct thorough inspections to assess any potential deterioration caused by moisture. Water intrusion often leads to weaknesses in load-bearing walls and beams, which might manifest as sagging or bowing.
To effectively identify these issues, follow these steps:
Flooding can pose significant risks to your home’s foundation stability, which is essential for maintaining long-term structural integrity.
The extent of moisture in soil from flood damage can lead to settling or shifting, compromising the structure. Evaluating the scope of the damage is critical. Use moisture meters and thermal imaging to identify affected areas.
Visible cracks, uneven floors, and misaligned doors signal potential foundation issues. The longer your home is exposed to floodwaters, the higher the risk.
An evaluation provides a detailed understanding of the damage, helping you address long-term issues. Professional evaluations, including soil testing and structural analysis, are essential to guarantee foundation stability.
This informed approach will guide effective remediation strategies, safeguarding your home’s future.
To effectively prepare a thorough damage report after a flood, begin with a meticulous visual inspection, capturing every detail of the visible damage. Document everything with photographs, as this visibility will be essential when communicating with your insurance company.
Take detailed notes on stains, discoloration, and mold growth. Use specialized tools like hygrometers and thermal cameras to detect moisture trapped in walls and floors, as damage often lurks where you can’t see. Your assessment helps create a clear picture of the damage.
Recommended steps include:
In evaluating flood damage, you’ll uncover hidden issues that could escalate if ignored. Imagine a home where water seeped into the walls, unnoticed, leading to mold growth behind the drywall. Using advanced tools, you identify moisture that isn’t visible, preventing future structural damage. Addressing these problems, like unseen electrical hazards, guarantees safety and long-term integrity. Preparing an extensive damage report aids in recovery and future protection, proving essential for homeowners and insurance assessments alike.
Mold reproduces by releasing spores that thrive in moist environments, needing high humidity and poor ventilation to grow. Common indoor molds, like Aspergillus and Penicillium, can cause respiratory issues and worsen asthma. To prevent mold, keep humidity below 60%, fix leaks, and guarantee good ventilation. If mold’s present, wear protective gear for cleanup or consult professionals for severe cases. Understanding these factors helps you manage mold effectively and safeguard your health and surroundings as you learn more about it.

Mold, a fascinating yet potentially troublesome fungus, reproduces by releasing tiny spores into the air. These spores settle on damp surfaces, which are ideal conditions for mold growth. High humidity and moisture levels above 60% provide the perfect environment for spores to germinate.
Once they find a suitable spot on organic matter, like wood or fabric, they develop into multicellular filaments called hyphae. These hyphae form a network known as mycelium, enabling mold to reproduce rapidly. A single colony can produce millions of spores quickly, posing significant health risks if mold proliferates indoors. Timely restoration of water damage is essential to prevent such growth and protect health.
While mold decomposes organic matter in nature, its presence in your home can lead to respiratory issues and other health problems, necessitating prompt attention and remediation.
When it comes to mold growth in homes, moisture is the primary culprit, often lurking in unexpected places. You might notice it in the form of water leaks or condensation in high humidity areas like bathrooms and kitchens.
If your home’s relative humidity levels hover above 60%, you’re creating a perfect environment for mold spores to thrive. These spores find nutrients on organic materials such as wood, paper, and fabric.
Poor ventilation can trap this humidity, further encouraging mold growth, especially in basements and attics. This unchecked mold can have serious health impacts.
To combat this, quickly address any water damage and keep indoor humidity below 55%. Doing so considerably reduces the risk of mold proliferation, protecting both your home and health.
You’re likely to encounter several types of mold in indoor environments, each with unique colors, textures, and associated health risks.
For instance, Aspergillus can thrive in HVAC systems, posing health risks, especially to those with weakened immune systems, while Cladosporium, often found on decaying plants, can trigger asthma flare-ups in damp areas.
Recognizing these molds and understanding their potential effects on health is vital for maintaining a safe and healthy indoor space.
Although mold is a common household issue, understanding the types you’ll likely encounter indoors can help manage their impact.
Various mold species thrive in indoor environments, especially where there’s water damage. Aspergillus is often found on dust and food, and can release mycotoxins, posing health issues through mold exposure.
Cladosporium, residing on fabrics and wood, can trigger mold allergies, especially in asthma-prone individuals.
Penicillium grows in damp areas like basements, often after water damage.
Alternaria, typically from soil, is another culprit for allergic reactions.
Finally, Stachybotrys, or black mold, thrives in moist conditions, producing dangerous mycotoxins.
Recognizing these indoor mold types can help you better manage health risks and maintain a safer home environment.
Identifying the colors and textures of mold in your home provides insights into the specific species you’re dealing with and the conditions they’re thriving in.
Mold colors can range from black, green, white, yellow, to blue, each hinting at different species and environments. For instance, Cladosporium appears greenish or black, often gracing fabrics and wooden surfaces in varied temperatures.
Aspergillus, with its fuzzy texture, lurks on dust, food, and building materials, sometimes producing harmful mycotoxins. Penicillium is typically blue or green, velvety, and loves water-damaged spots.
Meanwhile, Stachybotrys, or black mold, stands out as a dark greenish-black presence in damp areas, releasing mold spores that can be dangerous.
Knowing these distinctions helps you understand and address mold issues effectively.
When considering the health risks posed by indoor molds, it’s vital to understand the types commonly found in homes.
Mold grows in various environments, and exposure can lead to serious health issues. Aspergillus, Cladosporium, and Penicillium are prevalent indoors. Aspergillus often inhabits HVAC systems and produces mycotoxins that threaten those with weakened immune systems.
Cladosporium lurks in damp fabrics and wood, exacerbating asthma and causing symptoms such as sneezing. Penicillium appears on water-damaged surfaces, leading to allergic reactions and respiratory problems.
Stachybotrys, or black mold, thrives in wet areas, producing dangerous mycotoxins linked to severe health concerns, including respiratory distress.
To maintain health, it’s important to prevent mold growth by controlling moisture and ensuring proper ventilation.

If you’re worried about mold exposure, it’s important to understand the health risks it poses. Mold can cause significant health issues, especially for those sensitive or with pre-existing respiratory conditions.
Mold exposure can lead to respiratory problems like coughing and wheezing. Certain molds produce mycotoxins, which can be particularly dangerous, affecting your health in several ways:
Long-term exposure is linked to chronic respiratory conditions, highlighting the importance of addressing mold promptly.
How can you tell if mold is lurking in your environment? Begin by trusting your senses. A musty or earthy smell in your indoor air often hints at mold growth.
Look for visual signs, like green, black, or yellowish stains on walls or ceilings. These could indicate hidden mold behind damp surfaces. High humidity levels, especially above 70-75%, can foster mold proliferation.
Regular cleaning helps, but it’s essential to monitor areas like gypsum wallboard and vinyl coverings that trap moisture. Identifying moisture sources is vital since they contribute to mold growth and potential health impacts.
If you suspect mold, professional assistance might be necessary to effectively address and remediate the issue, ensuring a healthier living environment for you and your family.
To effectively prevent mold growth in your home, it’s important to manage moisture levels diligently. Keeping indoor humidity below 60% is essential, as higher levels foster mold-friendly conditions.
Regular inspections and prompt repairs of leaks in roofs, pipes, and foundations are critical for reducing unwanted moisture. Using dehumidifiers, especially in moisture-prone areas like basements and bathrooms, helps keep conditions dry and mold-free.
Proper ventilation also plays a key role in preventing mold growth.

While mold can be a persistent problem, managing and remediating mold-infested areas begins with swiftly identifying and addressing moisture sources.
Fix leaks and reduce humidity immediately, as mold thrives in damp environments.
During cleanup, wear protective gear like gloves, masks, and goggles to prevent health risks from mold spores.
Use diluted bleach solutions or commercial mold removers on non-porous surfaces.
For porous materials, consider removal if they’re heavily infested.
After cleanup, guarantee proper ventilation, and use dehumidifiers to keep indoor humidity below 60%, which helps prevent mold from returning.
If the mold problem is extensive or persistent, consult professional remediation services.
They’ve the expertise and equipment to effectively handle significant mold issues and guarantee your health remains protected.
You’ve learned how mold can sneak into your home and the health risks it poses. Coincidentally, by understanding its growth factors, you can take charge and prevent it. Identifying mold early is vital, so keep an eye out for signs. With the right strategies, you can manage and remediate any mold issues effectively. Remember, maintaining a dry and well-ventilated environment is your best defense against mold, ensuring a healthier living space for you and your loved ones.
In restoration, dehumidification plays an essential role in tackling moisture, preventing mold, and ensuring healthy indoor air. By reducing humidity levels to between 30-50%, dehumidifiers prevent musty odors and allergens from forming, which enhances air quality post-water damage. They work best with air movers, accelerating drying processes and protecting structures from moisture damage. This efficiency not only reduces restoration time but also costs, making them an indispensable tool. There’s more to uncover about maximizing their benefits.

When you explore the workings of dehumidifiers, you’ll find they play an important role in managing indoor moisture levels, especially during restoration projects.
These devices work by extracting moisture from the air through condensation. As air moves over cooled coils, moisture condenses into water droplets, which are then collected and drained. This process is vital in the restoration process, ensuring spaces dry efficiently and promptly.
High-capacity dehumidifiers are important for handling large volumes of moisture, greatly accelerating the drying process to prevent structural damage. Additionally, professional services ensure that dehumidification is conducted safely and effectively, minimizing the risk of mold growth.
When choosing dehumidifiers for restoration, you’ll find two main types: refrigerant and desiccant.
Refrigerant dehumidifiers work well in warm, humid environments, using cooling to condense moisture, while desiccant dehumidifiers capture moisture with absorbent materials, performing best in colder settings.
Each type has its strengths, so understanding their benefits helps you select the right equipment for effective moisture removal in various situations.
Refrigerant dehumidifiers, essential tools in the restoration industry, efficiently lower humidity levels in warm and humid conditions by cooling air over coils to condense and collect moisture.
These dehumidifiers play a pivotal role in water damage restoration. They’re designed to remove excess moisture from the air, improving indoor air quality. In environments where temperatures are above 60°F and humidity exceeds 50%, they shine.
Capable of extracting about 30-40 pints of moisture daily, they’re highly effective in typical water damage scenarios. Equipped with features like built-in pumps for easy water drainage and user-friendly controls, they’re easy to operate.
Often paired with air movers, they create an ideal drying environment, speeding up the restoration process in affected areas.
While refrigerant dehumidifiers stand out in warm conditions, desiccant dehumidifiers shine in colder environments. These units excel in removing moisture effectively, using chemical desiccants to tackle humidity even when temperatures drop below 0°C.
Dehumidifiers help maintain moisture control across a wide temperature range, guaranteeing reliable performance. In environments like basements or historical restorations, they prevent secondary issues like mold growth by stabilizing humidity between 30-50%, which is vital for protecting structures and materials.
With a moisture extraction capacity of 0.7 to 1.1 liters per hour per 100m³ at 20°C and 60% humidity, they assure effective moisture management. Whether it’s for residential or commercial use, desiccant dehumidifiers are essential in long-term moisture management applications.
To effectively prevent mold growth, you must use dehumidifiers to maintain indoor humidity levels between 30-50%, which greatly inhibits mold by removing excess moisture.
Mold can start growing within just 24 to 48 hours after water exposure, so quickly reducing moisture with dehumidification is vital to avoid infestations.
Dehumidification plays an essential role in preventing mold growth by effectively managing indoor humidity levels.
Using dehumidifiers, you can maintain humidity between 30-50%, critical for inhibiting mold. Mold can start within 24 to 48 hours of water exposure, so addressing moisture promptly is important.
Dehumidifiers help you tackle hidden moisture in crawl spaces and behind walls—spots often neglected but prone to harboring mold spores. By doing so, they play a pivotal role in restoration, preventing costly structural damage to materials like drywall and wood.
Additionally, dehumidifiers enhance indoor air quality by capturing airborne mold spores during remediation, stopping them from spreading further. Their use guarantees a cleaner, safer environment, making them indispensable in any mold prevention strategy.
Swift action is key when it comes to reducing moisture risks and preventing mold growth. Dehumidifiers play an essential role in this process, swiftly extracting moisture from the air and building materials.
By maintaining indoor humidity levels between 30-50%, you can effectively inhibit the growth of mold, which can begin within 24 to 48 hours after water exposure.
Here’s how dehumidifiers aid in water damage restoration services:
Act fast to guarantee safety and prevent costly repairs.
While maintaining a healthy indoor environment, dehumidifiers play an essential role in preventing mold growth by controlling moisture levels. By keeping indoor humidity between 30-50%, dehumidifiers inhibit mold, which thrives in high moisture.
Mold can start growing within 24 to 48 hours of water exposure, so acting quickly with dehumidification is imperative. These devices extract moisture from hidden spots, like crawl spaces and behind walls, targeting mold growth areas unseen to the naked eye.
Effective dehumidification not only reduces humidity but also boosts air quality. It eliminates musty odors and airborne mold spores, leading to a healthier indoor space.
Professional-grade dehumidifiers are indispensable in restoration, removing large moisture volumes and stabilizing conditions, thereby preventing long-term health risks linked to mold exposure.
To protect the structural integrity of a building, controlling moisture levels is essential.
Dehumidifiers play a significant role in maintaining humidity between 30-50%, preventing moisture-related issues like swelling and warping in wood and drywall. Excess moisture can cause severe damage, leading to costly repairs.
By reducing moisture, dehumidifiers also inhibit mold growth, which further weakens structures and poses health risks. After water damage, immediate dehumidification is important to minimize long-term structural problems. Additionally, professional sewage cleanup services from WDLA ensure that affected areas are properly treated and dried.
Here’s why moisture control is critical:

After safeguarding a building’s structure through moisture control, attention shifts to improving air quality post-water damage.
Dehumidifiers are essential in this process, as they considerably enhance air quality by reducing indoor humidity to ideal levels, typically between 30-50%. This reduction minimizes moisture, thwarting mold growth and allergens that can harm health.
By using advanced dehumidification services, you can quickly eliminate excess moisture, which also helps in reducing musty odors present after water damage.
High-capacity dehumidifiers are particularly effective, capturing airborne spores during mold remediation, ensuring cleaner air and a healthier environment.
They create a controlled atmosphere that prevents long-term air quality degradation, making dehumidifiers a crucial component in restoring and maintaining a safe, comfortable living space.
Deploying dehumidifiers efficiently accelerates the restoration process after water damage, guaranteeing a swift return to normalcy. By removing excess moisture, they prevent structural instability and ongoing damage.
Here’s how dehumidifiers help:
With these advantages, dehumidifiers play an essential role in efficient restoration.
When facing water damage, professional restoration services rely on high-capacity dehumidifiers to tackle the challenge head-on.
These dehumidifiers, whether refrigerant or desiccant, efficiently manage moisture removal from affected materials. Restoration experts assess water damage severity, strategically positioning these machines to optimize drying conditions. This approach prevents mold growth and structural harm, essential for effective water damage recovery.
Dehumidifiers work with air movers to create a controlled environment, accelerating the drying of carpets, drywall, and wood. Some professional-grade models can extract up to 231 pints of moisture daily, making them indispensable for large-scale projects.
Beyond speeding up restoration, they improve indoor air quality by removing excess moisture, reducing mold and allergens, and enhancing the overall cleanup process.
In restoration, dehumidification is your best friend, guaranteeing a swift return to normalcy. By using dehumidifiers, you prevent mold, protect structural integrity, and improve air quality after water damage. Remember, “an ounce of prevention is worth a pound of cure.” Moisture control accelerates restoration, saving time and money. Professionals rely on dehumidifiers to achieve these goals efficiently, making them indispensable in your restoration toolkit. Embrace dehumidification and guarantee a healthier, safer environment.
For effective drying and dehumidification processes, immediately assess water damage to prevent complications. Use advanced instruments to identify hidden moisture, and monitor levels to optimize drying. Guarantee proper airflow with high-velocity fans and strategic vent placement to enhance moisture extraction. Employ specialized equipment for quick water removal, then pair dehumidifiers with air movers for efficient drying. Keep humidity below 60% to prevent mold growth, protecting structural integrity and air quality. Learn more about these essential processes ahead.

When dealing with water damage, acting quickly is essential to prevent further complications. Immediate water damage assessment allows you to identify the extent of moisture intrusion and take steps toward effective structural drying and dehumidification.
Standing water can lead to mold growth within 24-48 hours, so detecting hidden moisture behind walls, under flooring, and in HVAC systems is vital. Advanced instruments are indispensable for uncovering these hidden threats, ensuring a thorough understanding of the damage. Professional services ensure accurate assessment and remediation, which is crucial in minimizing long-term damage.
You play a key role in ensuring proper ventilation, which is essential for effective moisture extraction.
By enhancing air movement, you can greatly boost the efficiency of dehumidification systems, allowing them to work swiftly and prevent issues like mold growth.
Using high-velocity fans or strategically placed vents, you can manage airflow to optimize moisture removal and maintain a healthy environment.
Effective moisture extraction in drying and dehumidification processes depends greatly on proper airflow. You need to guarantee air circulates efficiently, as this allows dehumidifiers to pull moisture from the air effectively.
The dehumidification process involves moving air over cooling coils or desiccant materials, where sufficient airflow is vital for ideal moisture removal. Continuous air movement prevents moisture pockets, assuring a thorough drying process and avoiding potential mold growth.
Consider these essential points:
Proper ventilation lays the groundwork for maximizing the efficiency of air movement in dehumidification processes.
You’re going to find that air movers play a significant role in this. They pull humid air into the dehumidifier, making moisture removal more effective. By maintaining a continuous cycle, these high-velocity air movers enhance evaporation after water’s been extracted.
Different dehumidifiers, like refrigerant systems, cool and condense moisture, while desiccant systems use a second air stream. Adjusting airflow rates is vital; it optimizes dehumidification performance, reduces drying times, and maintains ideal humidity levels.
This not only boosts the efficiency of moisture removal but also enhances comfort and prevents mold growth. So, keep an eye on airflow to guarantee you’re getting the most out of your dehumidification efforts.
When tackling water removal, you’ll find that techniques like pumping and vacuuming are essential to quickly eliminate standing water and prevent further damage.
Specialized equipment, such as submersible pumps and industrial vacuums, plays an important role in efficiently extracting water from surfaces like carpets and floors.
Once you’ve handled the immediate water removal, using high-power fans increases airflow to boost evaporation, setting the stage for effective drying and dehumidification. Additionally, professional water damage restoration services can ensure that your property is thoroughly dried and restored to its original condition.
Although dealing with water damage can be challenging, implementing effective water extraction methods is essential to preventing further harm and streamlining the drying process.
Rapid removal of standing water using pumps is important. These devices prevent further damage and facilitate the drying and dehumidification of affected areas.
Vacuum extraction is another method you can use to remove water from porous materials like carpets and upholstery, minimizing damage.
Once excess water is removed, high-powered fans enhance evaporation rates, ensuring residual moisture doesn’t linger.
Remember, it’s not just about removing water; dehumidification plays a key role in preventing mold growth and structural issues.
Here are three key steps to take into account:
Navigating the complexities of water damage requires specialized water removal equipment to secure efficient and effective recovery. High-capacity pumps are your go-to solution for extracting standing water, considerably reducing the risk of mold growth and structural harm.
For carpets and upholstery, vacuum extraction systems speed up the drying process without needing removal, saving time and effort. Industrial-grade air movers play a key role in drying and dehumidification services by generating high-pressure airflow that accelerates evaporation.
Meanwhile, dehumidifiers convert excess moisture in the air into liquid, preventing absorption into walls and furnishings. Using combination systems that merge water extraction pumps with dehumidifiers secures ideal drying conditions, minimizing damage and streamlining your restoration efforts for a thorough recovery.
To enhance evaporation effectively, high-power air movers play an important role in accelerating the drying process.
These machines greatly increase airflow, creating a low-pressure zone to remove moisture from various surfaces. When drying is the process you need, air movers excel by generating high-velocity airflow, often exceeding 3,000 CFM. This power helps reduce drying time and guarantees that moisture in the air doesn’t settle back onto wet materials.
Consider these key benefits:
These tools are vital for tackling water damage incidents efficiently.
When managing moisture control, understanding dehumidification strategies is essential for effective results. You can use refrigerant dehumidifiers to cool humid air, condense moisture content, and release reheated, dry air back into the environment. This approach helps prevent mold growth by maintaining ideal conditions.
Alternatively, desiccant dehumidifiers absorb moisture using hygroscopic materials, making them perfect for low-temperature settings sensitive to temperature changes.
Maintaining controlled air temperatures between 70 and 90 degrees Fahrenheit is vital. This range boosts evaporation rates, enhancing the dehumidification process while preventing equipment damage.
Pairing professional dehumidifiers with high-velocity air movers accelerates moisture removal, speeding up the return to normal humidity levels. By applying these strategies, you’ll effectively manage moisture content and safeguard against potential damage.

Accurate monitoring of moisture levels plays a pivotal role in guaranteeing effective drying processes. You need to continually check moisture levels to prevent mold and structural damage.
Advanced instruments like hygrometers and moisture meters are essential for getting precise readings. These tools help you adjust drying strategies and track progress. Ideal humidity should be below 60% because humid air can slow down drying and increase the risk of mold.
To guarantee you’re on the right track, consider:
Effective monitoring guarantees compliance with safety standards.
Although preventing mold growth might seem like an intimidating task, proper dehumidification makes it achievable and straightforward. By keeping indoor humidity levels below 60%, you can effectively curb mold growth, which thrives in environments with excess moisture.
Using dehumidifiers, whether refrigerant or desiccant, lowers humidity and inhibits mold spore development.
After experiencing water damage, regularly monitor humidity levels to ascertain conditions aren’t conducive to mold. Implementing a five-step drying and dehumidification process—comprising inspection, water extraction, evaporation, dehumidification, and monitoring—efficiently eliminates moisture supporting mold proliferation.
This method not only protects the structural integrity of your space but also reduces allergens and irritants linked to mold, enhancing overall air quality.
Proper dehumidification is your ally in maintaining a healthier, mold-free environment.
As you tackle water damage, remember that every moment counts. Swift assessment is vital, setting the stage for effective drying and dehumidification. Harness the power of airflow and high-power air movers to expedite evaporation. But don’t stop there—monitor moisture levels diligently. This vigilance helps prevent mold, safeguarding your space. With the right techniques and equipment, you can master moisture control, ensuring your environment remains safe and damage-free. Are you ready to take action? Your success depends on it.
Creating a home inventory for insurance is about thorough documentation and smart organization. Start by listing items with detailed descriptions, including make, model, and serial numbers for electronics. Capture photos and do a video walkthrough of each room, storing these digitally. Use home inventory apps for streamlined management, and update your list annually or whenever you acquire significant items. Keep records secure by utilizing cloud storage, ensuring your possessions are extensively documented for any situation. Explore more for deeper insights.

Although it might seem tedious, creating a home inventory is an essential step that guarantees you’re adequately prepared for unexpected events. A well-organized home inventory checklist is vital for confirming your insurance policy offers the right personal property coverage under your homeowners insurance.
By documenting valuable items, you can easily file insurance claims if they’re lost or damaged, streamlining the process with insurance companies and adjusters.
Moreover, maintaining a home inventory helps you accurately track the total value of your possessions, affirming you’ve set appropriate coverage limits. This proactive approach not only supports your claims but also aids in tax documentation for potential deductions due to theft or disasters.
Additionally, understanding your liability coverage limits can further enhance your preparedness for potential claims.
Ultimately, a detailed inventory guarantees you’re fully reimbursed for losses, providing peace of mind.
Creating a detailed home inventory is essential for guaranteeing you’re fully prepared in the event of a loss. Begin your home inventory list by including item names and detailed descriptions, like make and model, to guarantee clear identification.
Don’t forget to record the purchase price and current value of each item, which helps establish financial worth and guarantees proper reimbursement. Add serial numbers for high-value items, such as electronics and appliances, to aid in tracking and replacement during claims. Include the date and location of purchase to help insurers verify authenticity.
A household inventory list should be thorough, categorizing items by room or type. This approach guarantees that no valuable possessions are overlooked when compiling your insurance information. Additionally, consider documenting items that could be affected by water damage restoration to ensure comprehensive coverage in your policy.
Once you’ve identified the essential items for your home inventory, it’s important to focus on effective methods to document your home contents.
Start by using home inventory apps like Encircle or Nest Egg. These tools let you easily document items by scanning barcodes, uploading photos, and organizing them by room or category.
Conduct a video walkthrough of your home, narrating details of each item, especially high-value possessions, to create a visual personal property inventory for insurance claims.
Take photos of valuable items, capturing serial numbers and distinguishing features. Maintain a detailed spreadsheet with descriptions and estimated values.
Don’t forget to create a backup copy of your inventory and regularly update it to reflect any changes in your household contents.

To effectively organize and maintain your home inventory, start by categorizing items by room, including every space in your home from the kitchen to utility areas.
Document each item with detailed notes, and remember to update your inventory annually or after acquiring new valuables to keep it accurate.
Securely store your records, using cloud storage or another safe method, ensuring they’re protected from potential loss due to theft or disasters.
When organizing your home inventory, categorizing items by room simplifies the process and guarantees nothing slips through the cracks.
Start by making a list of household items in each room, from major appliances in the kitchen to decor and electronics in the living room. This method not only helps with insurance policies but also guarantees your home inventories are thorough and precise.
Document each item’s details, including make, model, and serial number, within the corresponding room folder. This keeps your inventory clear and accurate.
Remember to include photos of each room to visually capture everything, enhancing your records for insurance claims.
Regular updates are vital, so add new purchases and remove disposals promptly to maintain an up-to-date inventory.
Although it may seem like a tedious task, updating your home inventory annually is essential for maintaining accurate records and guaranteeing your insurance coverage remains appropriate.
Regular updates help you assess and adjust your insurance policy, preventing potential gaps in protection for your belongings. To keep your inventory relevant:

Using digital inventory solutions like home inventory apps can dramatically simplify how you manage your possessions.
By scanning barcodes and uploading photos, you can create a detailed and organized inventory that’s easy to update and access.
These tools not only streamline the process but also guarantee your records are accurate, supporting efficient and hassle-free insurance claims.
Digital inventory solutions revolutionize how you manage and protect your belongings, making home inventory effortless and efficient. By using a Home Inventory App, you can easily keep track of items, ensuring you’re ready to make a claim if disaster strikes.
There are numerous benefits of a home inventory system:
These digital solutions simplify the process, saving you time and providing peace of mind when evaluating insurance coverage.
Incorporating barcode scanning into your home inventory process transforms how you manage and protect your belongings. This technology allows you to quickly input item information, saving time and reducing manual entry.
Many home inventory apps feature barcode scanning, which fetches details like make, model, and purchase price from online databases. By minimizing errors in recording, you guarantee a reliable and thorough inventory list.
Barcode scanning also makes updates and maintenance a breeze, letting you track new purchases and changes in value effortlessly.
With the ability to scan items, you can easily organize your inventory by room or type. This enhances accessibility and improves your overall management process, making it simpler to locate and document your possessions for insurance purposes.

Securing your home inventory is essential, and there are several smart storage solutions to help you keep it safe.
First, store a file in a secure location like a safe deposit box to protect it from theft or damage.
Use cloud storage to keep a digital copy of your home inventory spreadsheet, ensuring it’s encrypted and password-protected.
Regularly update this file to reflect any changes in value or new items.
Maintain multiple copies, both physical and digital, to guarantee accessibility in emergencies.
You might also consider sharing access with trusted family members for added security.
Although it might seem like a tedious task, regularly updating your home inventory is vital to ensuring you have an accurate and extensive record of your possessions.
Update your home inventory at least once a year to reflect your current possessions and their values. Promptly add any new valuable items like electronics or jewelry to maintain extensive coverage.
Don’t forget to document changes in value due to depreciation or upgrades, as this information is vital for accurate insurance claims.
When you move or purchase a new home, create a fresh inventory to capture all belongings in the new environment.
Regularly reviewing your inventory helps you stay aware of your total personal property value, ensuring your insurance coverage levels are adequate.
Creating a home inventory is like having a safety net, ensuring you’re prepared for the unexpected. You’ve learned the essentials of building and organizing your inventory, from documenting items to utilizing technology for efficient management. Keep your records safe and regularly update them to reflect current possessions. With this proactive approach, you’ll protect your belongings and facilitate smoother insurance claims, giving you peace of mind and confidence in your preparedness.
For mold detection, start with visual inspections, using tools like moisture meters for non-intrusive assessments. Enhance findings with scientific confirmation techniques—swabs, tape samples, and extensive air sampling offer deeper insights into mold presence. Understand when intrusive methods are necessary to reveal hidden mold. Differentiate between complete and limited inspections, ensuring thorough coverage. Regular checks are essential, as mold impacts air quality and health, necessitating early detection. Discover how these steps maintain a safe indoor environment.

When it comes to detecting mold in a building, visual inspections play an essential role by serving as the starting point in the assessment process.
You begin with a non-intrusive visual inspection to identify mold growth and mold contamination. While this initial step can’t confirm the full extent of the problem, it’s vital for spotting moisture intrusion and areas that might encourage mold development.
By using tools like moisture meters and infrared cameras, you can detect hidden moisture that often signals potential mold issues. Although visual inspections don’t predict future problems, they guide you in understanding current conditions.
The findings typically lead to an extensive report containing recommendations for further testing or remediation, ensuring a thorough mold assessment process.
You’ll find that swabs and tape samples play a key role in identifying mold in specific areas, offering a straightforward approach to confirm its presence without measuring how much mold there is.
Meanwhile, air sampling stands out for its ability to provide an extensive look at mold spore concentrations in the air, which is critical for understanding potential health risks.
Swabs and tape sampling play an essential role in mold inspection, offering a simple yet effective method for identifying the types of mold present in a specific area. By focusing on localized areas, these methods help confirm mold presence through surface samples.
Swabs collect mold from surfaces using sterile tools, while tape sampling captures visible mold fragments. Though helpful in identifying mold types, these methods don’t quantify contamination extent or assess air quality.
Interpretation by lab technicians can vary, introducing potential inconsistencies. Dormant molds may be detected, but their presence doesn’t always indicate a significant health risk or concern for air quality.
For a thorough assessment, these techniques should be part of a broader strategy in mold inspection.
Air sampling stands as an essential technique in mold inspection, offering a scientific approach to confirm the presence of mold spores in indoor environments. By collecting samples from various locations and comparing them with outdoor air, you can assess mold concentration and viability.
This process is vital for evaluating indoor air quality, especially in areas with visible mold or moisture problems. Mold contamination can lead to health problems, and understanding spore levels helps pinpoint potential risks.
Through mold testing, you gain valuable quantitative data on spore concentration, guiding effective remediation strategies.
Remember, environmental factors like seasonal and diurnal changes can affect mold spore counts, so interpreting the results requires careful consideration.
Use air sampling to guarantee thorough mold inspection and promote a healthier indoor environment.
Detecting mold in indoor environments is essential for maintaining healthy air quality, and air sampling stands out as a key technique for this purpose. It quantifies mold spore concentrations, confirming mold presence and potential health impacts. By capturing spores from multiple locations, air sampling offers a thorough view of indoor air quality, unlike localized methods.
Here’s why it’s important:
Embrace air sampling to guarantee a healthier indoor environment.
When you need to uncover mold hidden behind walls or under floors, you’ll turn to intrusive methods, which involve the careful removal of building materials like drywall.
This approach helps expose concealed mold that non-intrusive techniques might miss, though it requires careful steps to minimize property damage.
While intrusive testing can reveal hidden mold sources, it’s important to remember it doesn’t guarantee a full assessment of the entire property’s mold situation.
Although non-intrusive methods are often preferred for their minimal disruption, sometimes you need to go a step further with building material removal to effectively uncover hidden mold.
Intrusive methods during mold inspection involve removing building materials to reveal hidden mold infestations, vital when other testing methods fail to identify mold contamination.
Here’s why you might consider this approach:
While disruptive, removing building materials helps in pinpointing and resolving mold problems, preventing future growth.
Uncovering mold that lurks behind walls or under floors often requires taking a more hands-on approach.
Intrusive methods in mold inspection, such as removing drywall or flooring, help reveal hidden mold that visual inspection and air samples might miss. These methods are usually a last resort when other testing approaches fail to provide clear evidence of mold presence.
While intrusive testing can confirm contamination, it doesn’t assess the full extent or impact on air quality, which might need further evaluation.
You should plan carefully when considering these disruptive techniques, as they can affect the building’s structure.
Ultimately, by examining environmental conditions and employing these intrusive methods, you can effectively uncover and address potential health risks posed by hidden mold.
Before diving into intrusive methods for detecting hidden mold, it’s essential to understand the step-by-step process that guarantees both effectiveness and safety.
When mold inspection using non-intrusive techniques doesn’t reveal the full extent of mold contamination, an intrusive approach might be necessary. This involves physically removing parts of the structure, like drywall or flooring, to expose hidden mold.
Here’s how to proceed:

Collecting and analyzing mold samples is an essential step in evaluating indoor air quality and determining the extent of mold contamination.
During a mold inspection, sample collection methods like air sampling, surface sampling, and bulk sampling play vital roles. Air sampling captures mold spores from indoor air to assess contamination levels and potential health risks by comparing them with outdoor air.
Surface sampling, using swabs or tape lifts, gathers localized data on mold species and concentrations from affected areas.
Bulk sampling involves removing materials suspected of mold growth for a detailed laboratory analysis. This analysis identifies specific mold species and concentrations, providing insights into the contamination levels.
Understanding these aspects informs effective remediation strategies, ensuring a healthier indoor environment.
After understanding the significance of mold sample collection and analysis in evaluating indoor air quality, it’s important to explore the differences between thorough and limited mold inspections.
A thorough mold inspection includes a detailed, non-invasive visual examination, moisture measurements, and collection of mold samples according to standardized procedures. This results in an extensive report detailing moisture intrusion and visible mold growth.
In contrast, a limited mold inspection focuses on specific areas defined by the inspector, addressing only visible mold and moisture signs.
Here’s what differentiates the two:
While the presence of mold in indoor environments may seem benign at first glance, it’s important to recognize its potential impact on health and safety.
Mold can produce allergens and irritants, leading to respiratory problems and allergic reactions, especially in sensitive individuals like those with asthma. Indoor air quality can deteriorate quickly due to mold contamination, making mold inspection and testing imperative.
Symptoms like coughing, sneezing, and eye irritation are common signs of exposure, underscoring the need for early detection. Certain molds, such as Stachybotrys chartarum, pose more severe health risks, including chronic respiratory issues.
To protect your health, regular inspections and moisture control are crucial. These strategies guarantee that mold doesn’t compromise indoor air quality or your well-being.
You’ve explored mold inspection and testing techniques, and now you know the irony: spotting mold isn’t just about seeing it. While visual inspections play a pivotal role, they often miss hidden threats. Scientific techniques and air sampling guarantee the air you breathe is clean, even when mold lurks unseen. Intrusive methods, though a bit inconvenient, reveal what the eye can’t. Ultimately, understanding these methods prioritizes your health, keeping your indoor environment safe and sound.
To restore flood-damaged electronics and appliances, first assess the extent of the water damage. Guarantee safety by disconnecting power and consulting professionals. Clean and dry items using clean water, specialized solutions, and drying tools. Evaluate if repair or replacement is needed based on condition, age, and insurance coverage. Document everything meticulously for claims. For future protection, regular inspections, humidity control, and strategic placement of devices are key. Continue to discover additional steps and tips.

When your electronics and appliances have been subjected to floodwater, examining the extent of water damage is vital for determining the next steps.
Begin by evaluating the condition of electronics like TVs or gaming systems, which often can’t withstand water exposure and might need replacement rather than repair.
For appliances such as washers and refrigerators, consider the age and condition before deciding on repair or replacement. Older units may not perform reliably after damage.
Document everything thoroughly; this is essential for insurance claims.
It’s best to have a professional technician assess the damage for both functionality and safety. Timely restoration is critical to minimize further damage and ensure safety.
Before diving into any recovery efforts, guaranteeing your safety when dealing with flood-damaged electronics and appliances is essential.
Start by disconnecting your home from the electrical grid to avoid electrocution. Wait for licensed electricians or emergency workers to confirm the area’s safety, especially if floodwaters touched electrical equipment.
Don’t light matches or use electronics near these items, as gas leaks can occur. Document every water-damaged item for insurance claims, and seek professional evaluations to assess safety and functionality before repairs.
If any electronics are deemed unsalvageable, guarantee their proper disposal to prevent hazards and environmental harm.
These safety precautions are vital for effective water damage restoration and protecting yourself and your property from further risks.
To effectively clean and dry your flood-damaged electronics, start by flushing them with clean water to remove contaminants like salt and sediment, ensuring the water runs clear before letting it drain completely.
Next, use specific cleaning solutions such as Flux-Off Water Soluble and Electro-Wash PX, applying them with aerosol sprays or dipping methods to thoroughly remove trapped moisture and surface residues.
For fiber optic connections, gently clean them with specialized swabs, lightly wetted, and test their effectiveness with a fiberscope.
Documenting each step for insurance purposes and consulting professionals if needed is also recommended.
Restoring flood-damaged electronics requires a careful approach to moisture removal, making certain you don’t inadvertently cause further harm.
Begin by flushing your affected electronic equipment with clean water. This step is vital for effective moisture removal as it washes away salt, sediment, and particulate matter.
The next step involves using cleaning solutions like Flux-Off Water Soluble to attract and remove trapped moisture. For stubborn contaminants, restoration professionals recommend aerosol sprays like Coventry Econowipes.
These sprays help dislodge moisture and speed up the drying process with tools like UltraJet Duster. Before reassembling, confirm all components are dry and contaminant-free using a QbE cleaning system.
Remember, thoroughness is key to successful restoration.
Having effectively removed moisture from your electronics, it’s now important to focus on cleaning contaminant residues that may compromise their functionality.
Start by rinsing your flood-damaged electronics with clean water to remove salt, sediment, and debris. Verify the rinsate runs clear before allowing the equipment to drain.
For trapped moisture, apply Flux-Off Water Soluble, either as an aerosol spray or by dipping the equipment, guaranteeing thorough cleaning.
Stubborn contaminants on telecommunications equipment can be cleaned using Electro-Wash PX. Spray and wipe all affected areas with Coventry Econowipes for best results.
Consult an appliance technician if you’re unsure of the procedure.
Once moisture is removed and residues are cleaned, your electronics should be better prepared for restoration and use.
Even though fiber optic connections may seem robust, they require careful maintenance to confirm peak performance, especially after exposure to contaminants like floodwaters.
Restoring these connections in your home appliances is essential. Here’s how you can effectively use cleaning solutions and tools to verify they’re restored after water damage:

Choosing between repairing and replacing flood-damaged electronics can feel challenging, but breaking down the decision into key factors makes it manageable.
First, assess the extent of water damage. If the electrical components are severely corroded, replacement might be the safer option.
Consider your insurance policy, as it can greatly impact the financial side—some policies might cover repairs but not replacements, or vice versa.
Safety should always be a priority; if there’s any doubt about the integrity of the electronics, replacement is often wiser.
Also, think about the age of the appliance. Older models mightn’t be worth the repair due to inefficiency and reliability issues.
Finally, consult manufacturer guidelines; repairs may void warranties, pushing you toward replacement. Additionally, understanding your insurance policy terms can help clarify what is covered under your plan.
When dealing with flood-damaged electronics, professional evaluation and restoration services are your best allies in guaranteeing safety and restoring functionality. Certified technicians are equipped with the expertise needed to assess and repair your devices.
Here’s why you should consider these services:
Trusting professionals guarantees your electronics are restored safely and efficiently.
To guarantee you maximize your insurance claim for flood-damaged electronics, it’s essential to document the damage thoroughly and accurately.
Begin by taking clear photographs of all visible damage to your electronics and appliances, capturing multiple angles and close-ups of affected areas. This documentation is vital when you file your insurance claim.
Create a detailed inventory list that includes the make, model, age, and estimated value of each item. This information helps your insurance adjuster assess the damage.
Keep receipts or proof of purchase for your appliances and electronics, as they verify value. Note how long each item was exposed to water or moisture, and promptly contact your insurance provider to report the damage, following their guidelines for claims.

To guarantee your electronics stay in top shape after a flood, it’s essential to conduct regular safety inspections, checking for signs of wear, corrosion, or moisture.
Control moisture by maintaining proper ventilation and humidity levels, which can prevent long-term damage.
Additionally, strategically placing appliances and using protective measures like surge protectors and UPS will help shield your devices from power fluctuations and future flooding risks.
Regular safety inspections are an essential part of maintaining flood-damaged electronics and appliances, guaranteeing they remain safe and functional over time.
After experiencing water damage, it’s vital to assess your appliances for usability and functionality. Regular safety inspections help identify potential hazards, such as damaged electrical components or gas lines.
Scheduling professional evaluations can prevent future problems and guarantee compliance with safety standards. Keep documentation of all inspections and repairs for insurance claims and future reference.
Implementing regular maintenance checks can detect moisture issues early, reducing the risk of corrosion.
When maintaining flood-damaged electronics, it’s crucial to implement effective moisture control measures to prevent long-term damage.
Start by installing a dehumidification system in flood-prone areas. This reduces moisture levels, protecting electronics from water damage.
Regularly inspect and maintain your HVAC systems to guarantee proper airflow and humidity control, avoiding moisture buildup that can harm sensitive equipment.
Use moisture-absorbing products like silica gel packets or activated charcoal in storage spaces to mitigate humidity levels.
Additionally, consider installing sump pumps in basements to remove water and prevent excessive moisture during heavy rains.
Periodically monitor humidity levels with hygrometers to detect issues early.
These preventive measures will help you maintain your electronics and appliances, promoting their longevity and reliability.
While protecting your electronics from flood damage, elevating appliances off the ground on sturdy platforms or shelves is a smart strategy to minimize water exposure during flooding events.
This protective measure helps prevent damage to your valuable electronics. Here are some additional tips:
In the aftermath of a flood, you’ll face the challenging task of reviving your electronics and appliances, but don’t worry—it’s possible! Prioritize safety, assess the damage thoroughly, and follow meticulous cleaning steps to restore your devices. Weigh the pros and cons of repair versus replacement; sometimes, a professional touch might be necessary. Document everything meticulously for insurance claims. With strategic maintenance and prevention, you’ll safeguard your devices, ensuring they’re ready to tackle any future deluge.