
To distinguish between minor and major water damage, check for signs such as warped materials, musty odors, and material discoloration. Minor damage often involves simple drying. In contrast, major damage may require professional help, especially if health risks are present due to contaminated water types like Category 2 or 3. Knowing the extent of structural issues is key. Stay observant, as recognizing these indicators early can prevent costly repairs. Learn more about resolving water damage effectively.
How do you determine the true extent of water damage in your space? First, evaluate the affected areas by identifying visible signs like warped materials or discoloration.
For significant water damage, consider professional help. Experts use moisture detection tools to uncover hidden water pockets, which threaten your space’s structural integrity. With moisture detection, you can better understand the severity and guarantee effective water extraction. Additionally, engaging professional services ensures accurate assessment and remediation of the damage.
Categories of Water are vital for evaluating health risks, as different types require varied responses. For instance, Category 3 water indicates severe contamination, posing greater health risks and demanding immediate action.
Don’t overlook the importance of swift evaluation; acting quickly can prevent further damage, reduce restoration costs, and safeguard your health.
When dealing with water damage, it’s essential to identify which of the three water categories you’re facing—Clean, Grey, or Black—since each presents different contamination levels and health risks.
Clean Water from sources like broken pipes is the least hazardous, but if left untreated, it can evolve into Grey Water, which poses moderate health concerns.
On the other hand, Black Water, from sewage or floodwaters, requires immediate professional intervention due to its severe contamination and high risk of infection. Immediate response from WDLA Services Offered ensures effective cleanup and treatment.
Understanding how to classify water categories is vital for effectively managing water damage and mitigating potential risks. You must identify the source of the water to determine the type of water you’re dealing with. Here’s a quick guide:
Recognizing contamination levels in water damage is essential for determining the appropriate response and ensuring safety.
When faced with water damage, identifying whether it’s Category 1, Category 2, or Category 3 is vital. Category 1 involves clean water from sources like broken pipes, posing no immediate health risks. However, if ignored for over 48 hours, it can escalate to Category 2, or Grey Water, which contains contaminants from household appliances.
This category presents potential health risks due to substances like detergents. Category 3, or Black Water, includes highly contaminated sources such as sewage and stormwater. This level demands immediate professional intervention due to severe health risks.
Understanding these contamination levels guides you in choosing the right restoration measures and safety precautions.
How do you assess the health risks associated with water damage? First, identify the category of water involved. Here’s how:
Understanding these categories helps protect your health during the restoration process.
Have you ever wondered what clues might signal that water damage has begun to compromise a building’s structure?
Look for visible sagging in ceilings or floors, which often indicates severe water damage and structural weakness.
Warping or buckling in wooden floors and walls can suggest prolonged exposure to moisture presence, hinting at major issues.
Dark stains or discoloration on surfaces may point to water intrusion and mold growth, both of which can degrade structural components over time.
Cracks in foundations or walls, especially if they appear suddenly or expand, are serious concerns that need immediate attention.
Musty odors often accompany mold or mildew, signaling hidden water damage that could lead to further structural deterioration if left unchecked.
Additionally, seeking professional restoration services can prevent further damage and ensure effective recovery.
Stay vigilant to these signs.

While understanding structural damage is important, evaluating health risks and contamination levels is equally essential when dealing with water damage.
You must recognize the difference between minor and major water damage categories to effectively mitigate health risks. Here’s what you need to know:
When determining the age of water damage, you’ll want to focus on inspection techniques that highlight key signs and symptoms.
Look for visible indicators like water rings, stains, and discoloration, which can clue you into the duration of moisture exposure.
Materials like wood or drywall may also show warping or buckling, suggesting prolonged damage, while a musty odor often points to older issues due to mold or mildew presence.
To accurately determine the age of water damage, inspectors employ a variety of techniques that reveal essential information about the duration and severity of moisture exposure.
By using these inspection techniques, you can better understand water damage timelines through various indicators.
1. Visual Indicators: Look for water rings and stains, as they often correlate with the duration of moisture presence.
Older stains suggest prolonged exposure.
2. Mold Growth: Thorough mold inspections can offer clues about the age of water damage.
Mold typically indicates older damage, as it doesn’t appear immediately after exposure.
3. Musty Odors: These odors often signal older water damage and help determine potential mold growth, aiding in age determination.
These methods offer insight into the history and impact of water damage.
Understanding how different materials react to water exposure can offer valuable insights into determining the age of water damage.
Porous materials like drywall and wood absorb moisture quickly, hinting at newer damage, while non-porous materials, such as tile, might indicate older water exposure due to slower absorption rates.
You can often spot water rings and stains on surfaces as visual timelines; newer ones are brighter, whereas older stains appear darker and faded.
Warping or buckling in wood or drywall suggests prolonged moisture exposure, requiring extensive remediation.
If you notice musty odors, mold growth is likely present, suggesting long-standing water damage.
Thick paint layers and tiles can trap moisture, hiding newer issues, yet peeling indicates older structural problems needing attention.
Identifying the signs and symptoms of water damage is essential for evaluating its age and severity.
By observing physical indicators like water rings and stains, you can determine how long moisture has been present and the extent of the damage.
Mold growth is a strong sign of older water damage, as it requires persistent moisture to thrive.
Warping in wood or drywall also suggests that the damage has been around for some time.
Musty odors hint at prolonged exposure to moisture, often indicating mold or mildew.
Here are three key indicators to assess water damage:
When you’re dealing with water damage, understanding the required restoration efforts is crucial to prevent further issues.
Minor water damage, often Class 1, might only need straightforward drying and dehumidification. In contrast, major water damage, possibly reaching Class 4, demands extensive moisture removal, structural repairs, and sometimes mold remediation.
The categories of water damage—ranging from clean water (Category 1) to contaminated water (Category 3)—dictate the level of professional intervention needed. Category 3, due to its health risks, requires immediate expert help.
Effective restoration for major damage includes a detailed assessment, addressing the source, and a thorough plan, often spread over days or weeks. Prompt action is crucial, as minor issues, if ignored, can escalate, causing greater damage and higher costs.

How do you know when it’s time to call in the experts for water damage? Recognizing when to seek professional assistance is vital. Here are three key indicators:
1. Structural Elements: If water damage affects walls, ceilings, or other Structural Elements, it’s time to reach out.
Professionals can prevent further deterioration and costly repairs.
2. Contaminated Water and Health Risks**: When dealing with contaminated water, such as sewage backups, professional intervention** is necessary.
Exposure to Category 2 or 3 water poses serious health risks.
3. Mold Growth and Moisture Issues: Notice musty odors or visible mold?
These signs of ongoing moisture issues demand expert attention to prevent health hazards and extensive damage.
In emergency situations, like flooding threatening electrical systems, don’t hesitate—call for help immediately.
In summary, distinguishing between minor and major water damage is like unraveling a complex puzzle. You’ll need to assess affected areas, identify the water type, and recognize structural damage signs. Don’t overlook health risks or contamination levels, and consider the damage’s age to gauge restoration efforts. When the waters get too deep, knowing when to call in the pros is vital. By staying informed, you guarantee effective and timely responses, safeguarding your property and well-being.
For effective water damage emergency management, rely on specialized equipment like thermo-hygrometers, moisture detectors, and infrared cameras to detect hidden moisture. Dehumidifiers and air movers expedite drying, preventing mold growth and structural harm. These tools adapt to varied environments, offering both residential and commercial applications. With these, you’ll efficiently minimize damage and maximize restoration success. Understanding their use guarantees a safer, prompt response to water damage crises, enhancing your capabilities in tackling such challenges. Discover more insights into optimizing restoration processes.

Thermo-hygrometers are indispensable tools in the field of water damage restoration. When you’re dealing with moisture, this damage restoration equipment provides vital data by measuring ambient humidity, temperature, dew point, and Grains Per Pound (GPP).
These metrics give you a clear picture of moisture levels in any given area, allowing you to identify hidden moisture pockets that typical moisture meters might miss. With precise readings, you can plan targeted drying strategies, effectively preventing mold growth caused by residual moisture. Additionally, utilizing advanced dehumidifiers during the drying process enhances the efficiency of moisture removal.
While thermo-hygrometers provide essential data on ambient conditions, moisture detectors are equally important for pinpointing the exact moisture content within materials.
In water damage restoration, these tools are indispensable for accurate moisture assessment. Pin-type moisture detectors penetrate surfaces to measure moisture directly, offering precise readings.
On the other hand, pinless models use electromagnetic sensors to detect surface moisture, ensuring the material remains undamaged. Some advanced moisture detectors even combine both methods, providing flexibility to address various assessment needs.
By identifying hidden moisture pockets, these devices prevent potential mold growth, a vital concern in water damage scenarios. Regular use of moisture detectors, alongside other restoration equipment, guarantees a thorough evaluation, ensuring effective remediation of affected areas. Additionally, professional services ensure accurate assessment and remediation, further enhancing the restoration process.
Using infrared (IR) cameras, you can effectively detect hidden moisture by identifying temperature variations in materials, which is essential during water damage emergencies.
These cameras allow you to pinpoint areas affected by water intrusion without resorting to invasive methods, making your clean-up and restoration efforts more efficient.
Infrared (IR) cameras are an important asset in detecting moisture intrusion during water damage emergencies. These devices are invaluable for damage restoration experts, as they capture thermal images highlighting cooler areas—often indicative of moisture due to evaporation cooling.
By revealing hidden water intrusions that aren’t visible to the naked eye, IR cameras help prioritize drying efforts, ensuring targeted and efficient restoration. When used alongside moisture sensors and meters, they offer a thorough assessment of moisture levels, enhancing the accuracy of the remediation process.
The ability to detect moisture behind walls and under floors prevents minor issues from escalating into major problems, ultimately saving time and resources. Embracing IR technology is vital for effective water damage management.
How can you effectively pinpoint areas affected by water damage when they remain hidden from plain sight? Infrared (IR) cameras are your answer.
These innovative tools detect temperature variations in materials, helping you identify unseen water intrusion and moisture retention. By capturing infrared radiation and converting it into thermal images, IR cameras reveal temperature differences, indicating areas where moisture might be trapped.
Using IR cameras allows you to efficiently plan targeted clean-up, using extraction equipment to remove moisture from the air and affected surfaces. They provide real-time feedback, enhancing the accuracy of moisture assessments when combined with other detection tools.
With IR technology, you can uncover hidden moisture behind walls, under flooring, and within insulation, preventing further damage and mold growth.
When facing water damage, you’ll find that using dehumidifiers, particularly low-grain refrigerant models, is essential for superior moisture removal.
These machines can pull over 200 pints of moisture from the air in a single day, greatly reducing the risk of mold growth, which can threaten health and structural integrity.
Even in challenging conditions, dehumidifiers excel at removing moisture from the air, making them indispensable tools in water damage emergencies.
Low-grain refrigerant (LGR) models can extract over 200 pints of moisture in just 24 hours, ensuring efficient moisture removal. These powerful machines work effectively across a wider temperature range, adapting to different environments to enhance moisture reduction.
Dehumidifiers, when combined with air movers, improve the drying process, creating a balanced environment that maximizes moisture extraction. Regular monitoring of humidity levels is essential, as these devices adjust in real-time to maintain peak performance.
Dehumidifiers don’t just remove moisture—they’re key players in preventing mold growth after water damage. By reducing relative humidity levels below 50%, dehumidifiers create an environment where mold struggles to thrive.
Specifically, low-grain refrigerant (LGR) models can extract over 200 pints of moisture daily, making them indispensable in water damage scenarios. These devices work effectively across various temperatures, ensuring consistent humidity control no matter the conditions.
When you act quickly and deploy dehumidifiers right after water intrusion, you markedly cut down the risk of mold growth, which can start within 24 to 48 hours.
Using commercial-grade dehumidifiers during restoration not only speeds up drying but also helps prevent long-term mold issues, securing a safer, healthier space.
In water damage emergencies, air movers play an essential role in expediting the drying process and mitigating further damage.
These high-velocity fans are specifically designed to enhance air circulation, speeding up the evaporation process vital for effective water removal.
Air movers come in various models, each with a capacity measured in cubic feet per minute (CFM).
Axial air blowers provide a focused airflow, while centrifugal air movers offer broader coverage, making them ideal for drying large areas.
To maximize efficiency, you might need to adjust the environment by removing drywall or making small cuts to access hidden moisture.
Pairing air movers with dehumidifiers creates ideal drying conditions, helping prevent secondary damage, like mold growth, ensuring your space is thoroughly restored.

Air scrubbers are essential tools in water damage restoration, effectively removing airborne particles, chemicals, and gases to vastly improve indoor air quality. You’ll find them indispensable for maintaining a safe environment during the restoration process.
These devices use different filtration systems, like HEPA filters, which capture up to 99.97% of particles as small as 0.3 microns. Wet air scrubbers trap pollutants with wet filters, while dry ones neutralize odors from mold and mildew using ionic purification methods.
When faced with the challenges of water damage restoration, self-propelled dump containers become your essential allies. These mobile units are designed to swiftly remove water-damaged materials, smoothing the restoration process.
You’ll find they can lift and transport heavy drying equipment like dehumidifiers, boosting efficiency on the job site. With various sizes and power capacities, these containers fit through tight spaces while maintaining mobility, making them versatile for different environments.
Their robust design guarantees the safe disposal of debris, so hazardous materials are handled properly. By using self-propelled dump containers, you minimize labor costs and time typically spent on manually handling water-damaged materials.
This efficiency is vital, helping you restore damaged areas effectively and swiftly.
In water damage emergencies, it’s essential to confidently choose the right tools. Thermo-hygrometers and moisture detectors diagnose damp dilemmas, while infrared cameras offer insightful imaging. Dehumidifiers and air movers help dry drenched domains, and air scrubbers guarantee spotless surroundings. Finally, self-propelled dump containers simplify debris disposal. By selecting the right equipment, you can swiftly, safely, and successfully manage water woes, assuring efficient and effective recovery. Equip yourself with knowledge and the right tools to tackle these challenges head-on.
To dispute a denied water damage claim, start by reviewing your policy to understand coverage and exclusions. Analyze the denial reasons and document everything with photos, logs, and repair estimates. Craft a well-organized appeal outlining how your situation falls under the coverage terms, and consider consulting a public adjuster or insurance attorney to strengthen your case. Finally, explore filing a complaint with the Texas Department of Insurance if needed. More guidance will equip you to navigate this process.

When you’re dealing with a denied water damage claim, understanding your insurance policy and its coverage becomes essential.
Explore the nuances in your policy to grasp what’s truly covered. Your experience may hinge on thoroughly reviewing the Declaration Page, which outlines key coverage details and highlights exclusions.
Burst pipes might be covered, but long-term leaks often aren’t, and knowing this can prevent surprises. Ambiguous terms can lead to misunderstandings, so clarity is vital.
Courts sometimes favor homeowners in cases of ambiguity, but having a legal team can be invaluable when your Damage Claim Denied becomes a reality.
Understanding specific terms helps you contest denials effectively, ensuring you’re prepared for any challenge your policy presents. Additionally, be aware that prompt incident reporting is crucial to avoid jeopardizing claims and prevent further issues.
When your water damage claim gets denied, it’s essential to understand the reasons behind it, starting with the common denial reasons like policy exclusions for maintenance issues.
You should also pay attention to how ambiguous language in your policy might lead to misunderstandings that favor the insurer’s interpretation.
Although managing the complexities of an insurance claim can be intimidating, understanding the common reasons for denial can greatly enhance your chances of success.
Claims often get denied due to various reasons behind the damage assessment. For instance, if your policy excludes specific types of damage like flooding, you might need separate flood insurance.
Insurers also classify gradual damage, such as long-term leaks, as maintenance issues rather than covered perils, leading to claim denials.
Furthermore, inadequate documentation can be a significant hurdle. If you lack photographs or repair estimates, your claim might be denied for insufficient evidence.
Steering through the intricacies of insurance policy language can feel intimidating, yet it’s essential to understand these terms to effectively dispute a denied water damage claim.
Many homeowners encounter policy language ambiguities, which can lead to misunderstandings about coverage. Insurance policies often differentiate between sudden water damage and gradual wear and tear, with the latter usually not covered, impacting the claims process.
When faced with a denied claim, thoroughly examine the denial letter, as it often references specific policy language. In states like Florida, courts may interpret ambiguous terms favorably for policyholders.
Engaging legal support can clarify these ambiguities, strengthening your position. Understanding these nuances in your policy could mean the difference between a denied claim and a successful appeal.
Maneuvering the complexities of insurance claims requires more than just understanding policy language; it also involves recognizing the impact of maintenance and neglect issues.
Insurance companies often deny water damage claims by attributing problems to poor maintenance. If you’ve neglected routine upkeep, like fixing a leaking roof, insurers might classify the damage as negligence, which isn’t covered.
To combat a denial, documentation is your ally. Keep repair receipts and maintenance logs to prove your commitment to upkeep. Insurers also look for signs of prior damage, so show evidence the damage was sudden.
To effectively dispute a denied water damage claim, you must first understand your policy’s coverage limitations and common exclusions.
Typically, insurance policies don’t cover long-term leaks, gradual damage, or issues arising from neglect, so reviewing these sections carefully is essential. Additionally, being aware of the importance of water damage restoration can strengthen your case by highlighting the need for timely interventions.
Although understanding your homeowners insurance policy can feel overwhelming, it’s crucial to grasp the common exclusions related to water damage to prevent unpleasant surprises. Knowing these exclusions can help you understand why the insurer might’ve denied your claim and prepare you to gather evidence and documentation for disputing it.
Common policy exclusions often include gradual damage, such as slow leaks, mold, and seepage, which insurers categorize as maintenance issues.
Review your policy’s Declaration Page thoroughly, as it outlines these exclusions and potential limitations.
When evaluating your homeowners insurance policy, understanding coverage limits is essential to guarantee that you’re adequately protected against water damage.
It’s important to know that many policies have specific exclusions, like ongoing leaks or flooding, which aren’t typically covered. These documents will list specific details, so review your Declaration Page carefully. This page outlines your coverage limits and exclusions, helping you determine if your claim denial has a legitimate reason.
Pay attention to monetary caps and time limits for reporting damage, as missing these can impact your coverage eligibility. Additionally, distinguish between sudden, accidental water damage and gradual damage; only the former is usually covered.
Familiarizing yourself with policy language guarantees you identify coverage limitations effectively.
Even if your water damage claim was denied, you can bolster your appeal by preparing detailed documentation and evidence. Taking appropriate steps now will strengthen your case for a written appeal.
First, gather extensive photographic evidence of the damage; this visual proof is vital. Utilize resources available to help compile a chronological log of all communications with your insurance company, noting dates and representatives involved.
Additionally, collect repair estimates from licensed professionals to demonstrate the damage extent.
Confirm all documentation, including the denial letter, is organized and accessible for a streamlined appeal.

To effectively navigate the appeals process for your denied water damage claim, start by thoroughly reviewing the denial letter to pinpoint why the claim was rejected. Understanding these reasons will guide your strategy.
Gather all necessary documentation, such as photos and repair estimates, to build a strong case. File a water damage appeal within the time frame specified by your insurance policy to avoid complications.
Clearly outline in your appeal how your situation aligns with the coverage terms, referencing specific policy language.
Consider hiring a public insurance adjuster; their track record in dealing with insurance company’s claims can be invaluable. Their expertise helps in deciphering complex policy language, ensuring your appeal is compelling and stands a better chance of success.
After gathering the necessary documentation for your appeal, it’s wise to consult with legal and insurance professionals to strengthen your case.
By consulting with insurance attorneys, you can gain clarity on why your water damage claim was denied and guarantee your rights are protected.
Public adjusters can negotiate with insurers, helping you secure the maximum settlement for your property damage.
If you suspect your insurer acted in bad faith, bad faith insurance lawyers can pinpoint wrongful denials or insufficient claim investigations.
Engaging experts early boosts your chances of a successful appeal, thanks to their professional documentation and support.
Many attorneys offer free consultations, allowing you to explore legal strategies without upfront costs.
When you’re faced with a denied water damage claim, exploring additional options and resources can be essential in turning the tide in your favor.
Start by considering a public adjuster. They can advocate for you and negotiate with your insurer to maximize your settlement.
If you suspect unfair denial, file a complaint with the Texas Department of Insurance (TDI). They can investigate and potentially penalize companies for bad faith practices.
Hiring an experienced insurance attorney to review your case might also be beneficial. Keep detailed records of communications and evidence regarding your claim.
Additionally, research expert articles and guides to better understand the claims process. These resources will equip you to effectively dispute the denial and seek a resolution.
You’ve got the tools to tackle a denied water damage claim with confidence. Start by understanding your policy, then analyze why the claim was denied. Identify any coverage limitations and gather solid documentation to support your case. Navigate the appeals process with determination, and don’t hesitate to consult professionals for guidance. Remember, persistence is key; like a river carving its path, your diligence can turn the tide in your favor. Stay focused, and pursue every available option.
To dry out a flooded property, act fast and efficiently. Begin by categorizing flood water (clean, grey, black) and document damage for insurance. Remove water using submersible pumps or wet vacuums; swift extraction is key to preventing mold. Enhance airflow with fans, open windows, and manage humidity using dehumidifiers within a 70-90°F range. Regularly monitor moisture levels and structural integrity to mitigate long-term damage. For more effective strategies, consider exploring further.

When floods strike, they bring a host of problems that can affect both health and property. During flood recovery, one of your first tasks should be water damage restoration.
Excess moisture can lead to mold growth within just 24-48 hours, posing serious health risks to you and your family. Mold remediation becomes vital to prevent these dangers.
The moisture doesn’t just stop at health concerns; it also compromises the structural integrity of your home, leading to potential structural damage over time. Wooden structures might suffer from dry rot due to fungal growth, while metal fixtures may rust. Additionally, timely restoration is crucial to effectively mitigate long-term damage to your property.
Implementing a thorough drying process is essential to counter these issues and safeguard your home. Act quickly to minimize damage and restore safety.
How do you begin the essential task of evaluating water damage after a flood? Start by categorizing the flood water: clean, grey, or black, which helps determine the right drying methods.
Document everything with photos and videos for insurance companies. Check structural integrity by inspecting walls, floors, and ceilings, as moisture can weaken them.
Use moisture meters to get accurate moisture readings—aim for acceptable levels of 9-14% in wood and 1-2% in plasterboard.
If you’re unsure about the damage’s extent, seek professional advice to guarantee safety and thorough evaluation, especially in hidden areas. Flood damage restoration services are crucial for effectively addressing the aftermath of a flood.
Dehumidifiers can aid in reducing moisture levels, but knowing the precise extent of damage is vital before employing these or other drying methods.
When a property floods, acting quickly to remove excess water is essential to prevent further damage and mold growth.
You’ll want to use effective equipment like submersible pumps or wet vacuums to expel standing water efficiently. Additionally, engaging a professional for sewage cleanup services can ensure that all health risks associated with the flooding are managed effectively.
Swift action is essential when dealing with a flooded property, as immediate water extraction is your first line of defense against extensive damage.
The immediate removal of excess water is vital to prevent mould growth and structural damage. Start by using pumps and wet/dry vacuums to extract standing water swiftly. These tools are designed for rapid and efficient water removal.
For larger volumes, calling a professional for a submersible pump is wise, as it expels water through a hose effortlessly. Remember, standing water can cause rusting of metal fixtures and compromise wooden structures if left unchecked.
If tools aren’t available, use buckets to scoop out water, but act quickly. The longer water lingers, the greater the risk of damage.
Tackling a flooded property requires the right equipment to guarantee swift and effective water removal, which is essential in preventing further damage.
Immediate removal of water is vital, and a submersible pump is highly effective for expelling large amounts of water outside, considerably speeding up the drying process.
For standing water on floors, wet/dry vacuums are indispensable, efficiently sucking up excess moisture. If you don’t have these tools, using a bucket can help, but it’s less efficient.
Combining these water removal techniques with air circulation from fans and dehumidifiers enhances drying effectiveness. This combination helps manage humidity control, reducing moisture-laden air and preventing mold growth.
With the right equipment, you can effectively tackle any flooding situation.
Although dealing with a flooded property can seem challenging, effective ventilation and air circulation strategies are vital to successful drying.
Start by opening windows and doors to encourage natural airflow, which will help reduce indoor humidity levels.
Strategically place oscillating fans to enhance air circulation and direct moist air toward dehumidifiers, supporting the evaporation process from wet surfaces.
Maintaining a temperature range of 70-90°F is important, as cooler air slows evaporation, and higher temperatures can hinder dehumidifier performance.
Regularly monitor humidity levels and moisture content using moisture meters to guarantee drying efforts are effective.
These steps not only accelerate drying but also prevent mold and mildew growth.

Dehumidifiers play an essential role in drying out a flooded property by efficiently reducing humidity levels in enclosed spaces. They extract moisture from the air, considerably speeding up the drying process.
To maximize effectiveness, set dehumidifiers within an ideal temperature range of 70-90°F. Cooler air slows evaporation, while excessive heat can reduce their efficiency.
Pairing dehumidifiers with air movers enhances airflow, directing moist air towards the dehumidifier and accelerating drying. Using a dehumidifier with a hose attachment allows for continuous drainage, letting you focus on drying wet items without constant tank emptying.
Regularly monitor humidity levels with a moisture meter to verify they remain ideal, preventing mold growth and guaranteeing a thorough drying process.
When dealing with the aftermath of a flood, effective cleaning and thorough inspection procedures are vital to restore your property safely and efficiently.
Start by thoroughly documenting damage with photos before discarding items. This step is important for insurance claims.
Use specialist cleaning equipment to tackle contaminants and prevent mold. Employ a moisture meter to assess the extent of water retention.
Inspect your property’s structural integrity carefully—overlooking damage can lead to issues like dry rot.
For drying wet areas, utilize dehumidifiers, air conditioning, and fans to boost air circulation and lower humidity.
Guarantee professional evaluation of electronics, as moisture can impair their functionality.
To guarantee your flooded property dries effectively, start by regularly monitoring moisture levels with moisture meters, which are essential for tracking moisture content in building materials.
Wood should have levels between 9-14%, while plasterboard needs 1-2%. Daily monitoring of psychrometric conditions, like humidity and temperature, guarantees your drying strategy keeps moist air at bay.
Adjust how your dehumidifiers work and use air movers as the process unfolds to maintain low humidity and prevent health problems. By expanding airflow across the surface area, you enhance the recovery process.
Conduct visual inspections and physical checks for immediate feedback. Keep a log of moisture readings and conditions, guaranteeing the materials absorb moisture properly and your efforts lead to a safe, dry home.
In managing a flooded property, acting swiftly is essential—every day you delay can increase the repair cost by up to 100%. Start by evaluating the damage and removing water promptly. Enhance ventilation with fans and open windows, and employ dehumidifiers and heaters effectively. Regularly clean and inspect to prevent mold growth, ensuring a thorough drying process. By closely monitoring the progress, you’ll protect your property from further damage and restore it efficiently, minimizing long-term impacts.
When tackling DIY mold removal, remember to wear N95 masks, gloves, and goggles for protection. Don’t create airborne spores by using fans in moldy areas. Opt for natural cleaners like vinegar or baking soda for safe results, and avoid mixing bleach with other cleaners to prevent toxic fumes. Contain the work area with plastic sheeting to stop spore spread and dry surfaces thoroughly afterward. Discover more about safeguarding your space effectively.
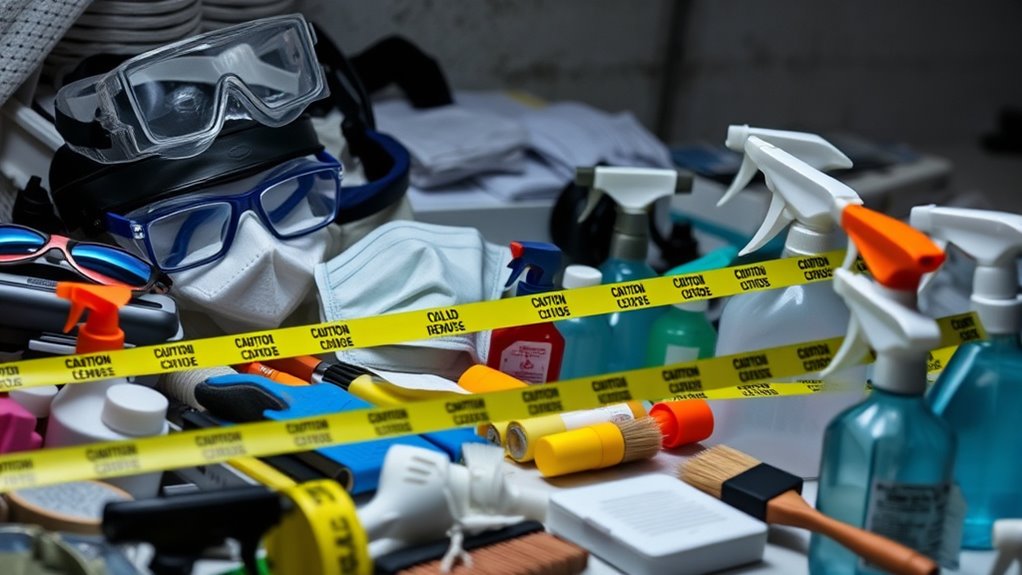
When removing mold from your home, it’s essential to prioritize safety to protect yourself and others.
Start by wearing personal protective equipment like N95 masks, rubber gloves, and goggles to prevent inhaling mold spores and contact with your skin and eyes. Guarantee proper ventilation in the work area, but avoid using fans that might disturb mold.
Use plastic sheeting to contain the work area, preventing spores from spreading. Take care not to disturb mold, as it releases mycotoxins and spores, posing health risks.
Dispose of contaminated materials by placing them in sealed bags to prevent cross-contamination. Avoid inhaling any spores or fumes from cleaning solutions, maintaining a safe environment for everyone involved in the mold removal process.
When tackling mold in your home, you can choose between natural solutions like undiluted white vinegar and baking soda, or commercial mold removal products for a more potent approach.
Natural options are effective and safe for most surfaces, while commercial products often provide faster results but may require more safety precautions.
Consider the surface type and mold severity to decide which solution will work best for you, always ensuring proper ventilation during the cleaning process.
While tackling mold issues in your home, it’s beneficial to explore natural cleaning options that are both effective and eco-friendly.
Undiluted white vinegar serves as a powerful natural mold cleaner, tackling up to 82% of mold species. Spray it directly on surfaces, let it sit, then scrub for effective mold removal.
Hydrogen peroxide is another excellent choice; use a 3% solution to kill mold and maintain hygienic surfaces.
Tea tree oil mixed with water works wonders not only for mold prevention but also leaves a pleasant scent. These cleaning products address hygiene issues effectively.
Baking soda is great too—it absorbs moisture, preventing future growth.
Dealing with mold is never pleasant, but commercial mold removal products offer powerful solutions that can make the task more manageable.
These products often contain strong fungicides to kill mold on contact, making them effective for cleaning mold on tiles and other non-porous surfaces.
However, they may not penetrate porous materials like wood, where mold can return if not fully addressed.
For those concerned about harsh chemicals, eco-friendly mold removers with natural ingredients like tea tree oil are available. They eliminate mold effectively while reducing health problems.
Always read labels for proper usage and follow safety guidelines—wear protective gear like gloves, goggles, and masks.
Address any moisture issues first to prevent mold from returning and guarantee a mold-free environment.
To effectively tackle mold issues, it’s important to first identify and address the sources of moisture that encourage its growth.
Mold thrives in humid environments, so checking for leaks and poor ventilation is essential. Common areas prone to moisture include basements, bathrooms, kitchens, and around windows or pipes. Addressing these issues helps prevent mold growth.
Fix plumbing leaks promptly and make certain roofs are intact to reduce moisture levels. Installing dehumidifiers can help maintain indoor humidity levels below 60%, which is crucial for preventing mold problems. Additionally, timely restoration of water damage is critical in minimizing long-term issues such as mold growth.
Regular cleaning and inspections, especially after heavy rainfall, can reveal signs of dampness or water intrusion. By addressing moisture sources, you can effectively prevent mold issues before they become significant problems.
Mold can be a stubborn nuisance, but with the right techniques, you can effectively remove it from various surfaces in your home.
Start by addressing black mold on hard, non-porous surfaces with a bleach solution—one cup of bleach per gallon of water. Let it sit to kill the spores.
For porous materials like drywall, gently scrub the affected area using a detergent and water solution. In damp environments, use undiluted white vinegar, allowing it to penetrate for 15 minutes before scrubbing.
To prevent mold, dry the area thoroughly with fans or a dehumidifier. On wood, sand first, then clean with a HEPA vacuum.
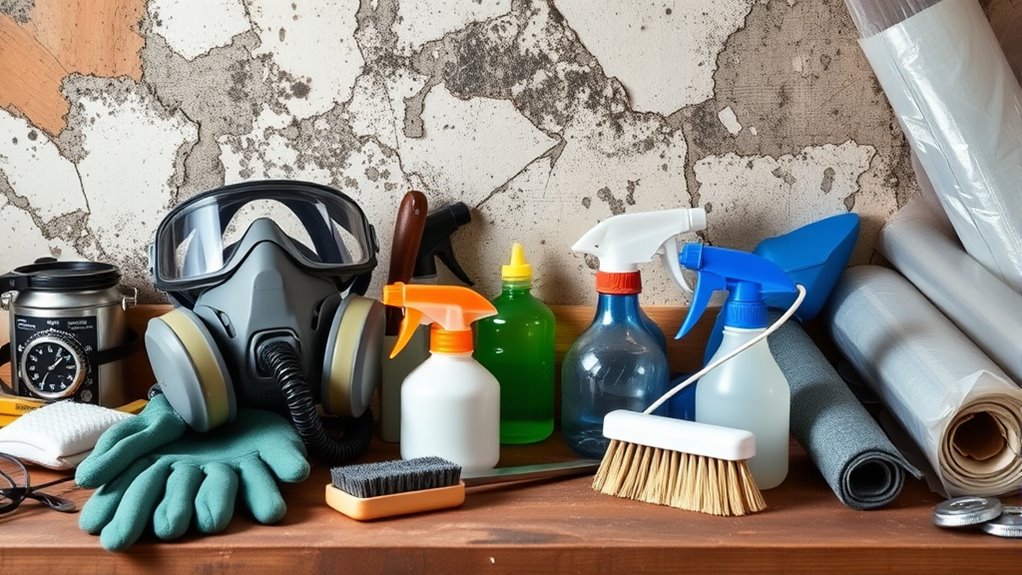
When tackling mold removal, having the right tools and gear is crucial for both effectiveness and safety.
Start by equipping yourself with rubber gloves and protective eyewear to shield your skin and eyes from mold spores. A scrub brush and cleaning cloths are necessary for scrubbing affected areas and wiping away residues.
To prevent mold spores from spreading, use a vacuum with a HEPA filter. Don’t forget N95 masks to avoid inhaling spores.
Prepare effective cleaning solutions using dish soap, white vinegar, or baking soda. These natural ingredients combat mold without harsh chemicals. A spray bottle guarantees even coverage of these solutions.
Equipped with these tools and gear, you’re set to tackle mold removal confidently and safely.
When tackling mold remediation, it’s essential to wear proper protective gear like N95 masks, gloves, and goggles to shield yourself from harmful spores.
Be cautious with cleaning products; mixing bleach with ammonia or other cleaners can create dangerous fumes that threaten your health.
Additionally, make sure you’re not spreading mold spores by using fans in affected areas, as this can exacerbate the problem instead of containing it.
Although tackling mold removal yourself can be challenging, equipping yourself with the right protective gear is essential for your safety and success.
To minimize exposure to mold spores and prevent health risks, always wear appropriate personal protective equipment (PPE). Here’s what you need:
Finally, change out of contaminated clothing and wash separately to keep mold confined.
To guarantee safe and effective mold removal, understanding the precautions for using cleaning products is essential.
In DIY mold remediation, always wear protective gear like gloves and masks to minimize health risks.
When tackling black mold, avoid mixing bleach with ammonia; this toxic combo can harm your health.
Use a bleach solution on non-porous surfaces, mixing 1 cup of bleach with 1 gallon of water, and don’t rinse it off to ensure effectiveness.
For porous surfaces, a 50/50 ammonia-water solution can help, but remember to rinse after 2-3 hours.
As a natural mold killer, undiluted white vinegar is effective on hard surfaces, eliminating 82% of mold species.
Following these cleaning product precautions ensures a safer mold removal process.
If you’re aiming to prevent mold from making a comeback in your home, focusing on controlling humidity is key.
First, remove excess moisture by maintaining indoor humidity below 60%. Use dehumidifiers and guarantee proper ventilation, especially in bathrooms and kitchens.
Second, regularly inspect and repair leaks from plumbing, roofs, or windows to avoid moisture buildup. This practice will considerably enhance air quality and prevent mold growth.
Third, clean and dry any wet surfaces within 24 to 48 hours, making sure mold spores don’t settle and multiply.
Finally, consider using mold-resistant paints and treatments in high-moisture areas, making your home an inhospitable environment for mold.
Here’s a quick checklist:
Tackling mold removal is like steering a ship through stormy waters—armed with the right tools and knowledge, you’ll reach clear skies. Prioritize safety, use effective cleaning solutions, and address mold at its source. Equip yourself with the right gear and avoid common pitfalls. By following these guidelines, you not only remove existing mold but also prevent its return, ensuring a healthier environment. Your diligence today lays the groundwork for a mold-free tomorrow.
For effective water damage repair, immediately identify the water category: clean, gray, or black, as each requires a unique response. Quick steps include halting the water source and using tools like industrial vacuums and submersible pumps for extraction. Dry the space with high-capacity dehumidifiers to prevent mold. Documenting the process is essential for insurance claims, so take photos and keep detailed records. Armed with this approach, you can preserve your property’s integrity and find more strategies along the way.

Identifying the types of water damage is essential for effective water damage restoration.
Start by evaluating the source. Clean water damage, like from rain or broken pipes, poses minimal health hazards. Gray water, from dishwashers or washing machines, carries minor contaminants that can cause illness. Black water damage, resulting from sewage or floodwaters, is the most severe, requiring professional cleanup due to its health risks. Quick response is critical in minimizing damages, especially when dealing with black water damage.
Properly classifying the category helps prevent mold growth and guarantees safety. For instance, black water damage demands thorough sanitization to eliminate pathogens.
Understanding these categories not only guides restoration efforts but also influences the safety measures necessary for a successful recovery.
To effectively manage water damage, you should start by shutting off the main water supply to stop any further leakage, allowing you to assess the situation.
Next, conduct a thorough inspection to identify the water source, categorize the damage, and determine what safety precautions are necessary.
With this information in hand, you can formulate a solid mitigation strategy, involving prompt water extraction and ventilation to prevent mold growth and further issues. Additionally, be sure to promptly report the damage to your insurance provider, as timely reporting influences claim outcomes.
When faced with water damage, quickly evaluating the situation is essential to preventing further harm.
Start by taking immediate action to identify and stop the water source. Conduct thorough assessments of the affected areas to understand the extent of the water damage. This helps in planning effective water damage restoration and determining the category of damage, which guides your cleanup and repair strategy.
Document everything with photos and notes for insurance claims. Prioritize the removal of standing water and damaged materials to minimize additional damage.
Always guarantee your safety by wearing protective gear, especially if the water might be contaminated. By swiftly addressing these aspects, you lay the groundwork for effective restoration and prevent further complications.
Where does water damage begin? It starts with identifying the source of water intrusion.
First, inspect pipes, appliances, and roofing for any leaks or failures. Shutting off the main water supply immediately is essential to prevent further water intrusion and minimize damage.
Once you’ve halted the flow, conduct a thorough inspection to determine the contamination category of the water. This step is critical as it dictates the cleanup process needed.
Look for visible signs of water damage, such as swelling, warping, or discoloration, to assess the extent of the problem. Document everything with photographs and descriptions to support any insurance claims and inform the restoration plan.
Mitigation strategy formulation begins with decisive action to control water damage effectively.
First, identify the water intrusion source and stop it immediately. This might mean shutting off the main water supply or repairing a leak.
Next, assess the damage to categorize it as Category 1, 2, or 3, which directs your mitigation efforts and safety measures during the water damage restoration process.
Promptly remove standing water using industrial vacuums or pumps to prevent mold and structural issues.
Increase airflow by opening windows and using fans, speeding up drying and reducing mold risks.
Finally, document all damage and mitigation steps with photos and written records. This documentation supports insurance claims and aids future restoration efforts, ensuring a thorough approach to recovery.
To effectively tackle water damage, understanding both mitigation and remediation techniques is vital. First, focus on water extraction, a significant step where standing water is removed using industrial-grade equipment like submersible pumps.
Mitigation efforts don’t stop there; they also include drying the affected areas, which prevents further deterioration and prepares the space for effective restoration.
Remediation, meanwhile, involves cleaning, deodorizing, and sanitizing materials, especially essential for severe cases like Category 3 water damage. Utilizing commercial dehumidifiers guarantees thorough moisture reduction, safeguarding against mold growth. Additionally, enlisting the help of professional restoration services ensures a comprehensive recovery process tailored to your specific needs.
Document every step with photos and written records to support insurance claims and future needs. By integrating these strategies, you’re not just addressing immediate issues but setting the stage for all-encompassing recovery.

When tackling water damage, start by carefully evaluating the structural damage to elements like beams and joists, as catching issues early can save you headaches later.
You should replace warped or rotting wood quickly to keep the building stable and prevent further damage from spreading.
Use industrial fans and dehumidifiers to guarantee everything dries properly, and remember to apply moisture-resistant sealants to new materials for added protection against future water problems.
Evaluating the structural integrity after water damage is essential for ensuring the safety and longevity of a building.
Begin your water damage restoration quickly by inspecting structural components like walls, ceilings, and floors. Look for signs of sagging, warping, or cracking, which might indicate compromised integrity.
Use moisture meters to detect hidden moisture within these components, as undetected moisture can lead to further deterioration and mold growth. If you suspect significant damage, engage a professional engineer or contractor for expert guidance.
Document all findings and repairs meticulously for insurance purposes, as detailed records can support claims and future property evaluations.
Addressing water-damaged materials promptly is essential for restoring a building’s structural integrity and preventing further issues.
Begin by inspecting all compromised areas, focusing on the most affected spots. When repairing, always remove and replace any warped or rotting wood to guarantee the structure remains sound.
For drywall, cut back to the framing studs, eliminating all water-damaged sections, and secure new drywall before finishing with joint compound for a seamless appearance.
Don’t overlook insulation; discard and replace it if damaged to maintain energy efficiency and ward off mold.
Seal and caulk all new materials to prevent future leaks, enhancing overall durability.
To guarantee the long-term stability of a structure after water damage, it’s vital to thoroughly assess the extent of the damage and act promptly.
Early detection with moisture meters is key for effective damage restoration. You should replace compromised wood, drywall, or insulation, as these materials can harbor mold issues and weaken structural integrity if left unchecked.
Damage restoration usually involves preventive measures like sealing and caulking around fixtures, ensuring moisture-resistant materials are used in water-prone areas.
It’s important to inspect and maintain plumbing systems and drainage solutions regularly, which will help mitigate future water intrusion.
When it comes to tackling water damage repair, having the right tools and equipment is vital to success.
You’ll need professional-grade tools for efficient water removal. Industrial vacuums and submersible pumps are essential for the initial extraction process.
Once the water’s gone, high-capacity dehumidifiers are key to reduce moisture levels, preventing mold and mildew from taking hold.
Consider renting specialized restoration equipment like:
With the right tools, you’re equipped to tackle water damage effectively and efficiently.
After equipping yourself with the right tools for water damage repair, it’s equally important to focus on mold prevention and humidity management to guarantee long-term safety and comfort.
Maintaining indoor humidity levels below 60% is vital to avoid mold growth, as higher levels lead to moisture accumulation. Aim for a humidity range between 40-60%, adjusting based on your area’s climate. Regularly monitor these levels to verify effectiveness.
Dehumidifiers are essential in removing excess moisture from affected areas, reducing humidity and hindering mold development. Additionally, proper ventilation by opening windows and using fans promotes airflow, aiding in drying and preventing mold.
Don’t forget to inspect and maintain plumbing and roofing to avoid leaks that increase indoor humidity and contribute to mold issues.

Thoroughly documenting water damage is essential for a successful insurance claim, as it provides necessary evidence for the insurer.
Start by capturing clear photographs and videos of all affected areas and items from multiple angles. This visual documentation will support your claim by showing the extent of the damage.
Create a timeline of events, noting when the damage occurred, when you discovered it, and any steps you took to mitigate further issues. These details help establish a clear narrative.
Organize all documentation carefully, as insurers may request additional information. This guarantees a smoother claims process.
You’ve commenced on a journey to conquer the chaos of water damage, transforming disaster into triumph with unparalleled expertise. By mastering the identification of damage, executing swift initial steps, and employing cutting-edge mitigation techniques, you’re not just repairing structures—you’re resurrecting them. With the right tools and a keen eye for mold prevention, you’ll guarantee long-lasting protection. Documenting every detail for insurance claims guarantees you’re not just surviving the flood, but thriving afterward.
Quick responses play an essential role in customer satisfaction and trust. Most customers expect answers within ten minutes, and meeting this can boost loyalty. Fast responses, ideally under a minute, can increase conversions by 391% and enhance your brand image, as speedy service shows reliability. It’s vital in a competitive market to attract more sales and improve customer recommendations by 33%. Learn how to harness this advantage in your business strategy.

When it comes to customer satisfaction, quick response times play an essential role. You mightn’t realize it, but 82% of customers expect an answer within 10 minutes. Meeting this expectation can greatly boost customer satisfaction and loyalty.
Quick responses don’t just make customers happy; they can also drive sales, capturing up to 50% more simply by being prompt. Imagine responding in under a minute—it could increase conversions by a staggering 391%.
Your ability to provide fast responses also influences your brand’s reputation. In fact, 72% of customers share positive experiences based on timely service. Additionally, a swift response in emergency situations, such as water damage restoration, can significantly minimize property damage and enhance customer trust.
Speedy service isn’t just a convenience—it’s a cornerstone of building trust with your customers. When you provide quick responses, you’re not only meeting expectations but also establishing a solid foundation for customer trust.
Studies show that 90% of customers trust companies that deliver excellent service swiftly. Meeting the ten-minute response expectation is essential, as it fosters trust and satisfaction.
Offering fast service also encourages 72% of customers to share their positive experiences, boosting your reputation. Responding within one minute can increase conversions by 391%, highlighting how prompt replies drive business success. Additionally, companies like WDLA demonstrate the importance of rapid response times in managing flood damage restoration effectively.
Although quick responses are often seen as a customer service strategy, their impact on sales and lead generation is equally notable. Quick Response Times can capture up to 50% of sales, linking fast response directly to revenue generation.
Imagine boosting your conversions by an impressive 391% just with a one-minute response time. It’s clear that immediate engagement not only improves response but also markedly influences purchasing decisions.
In fact, 78% of shoppers prefer buying from sellers who respond first, making speed a decisive factor. Additionally, 72% of customers share positive experiences based on prompt service, attracting new leads.
A fast response can even drive word-of-mouth marketing, as 33% of customers would recommend a brand solely for its swift response.

Prompt responses play a pivotal role in enhancing a brand’s image, as they convey reliability and attentiveness to customer needs. When you prioritize quick responses, you show customers that you value their time and are committed to providing excellent customer service.
In fact, a speedy service, with response times under ten minutes, is essential—90% of customers trust companies known for such efficiency. This trust not only boosts your reputation but also differentiates you in a competitive market; 78% of shoppers prefer sellers who respond first.
Consistently fast responses foster customer confidence and loyalty, leading 33% of customers to recommend your brand solely for your response speed. By prioritizing rapid engagement, you enhance customer satisfaction and create a positive brand image.
When aiming to achieve fast response times, implementing effective strategies is essential for maintaining customer satisfaction and enhancing brand reputation.
Start by using customer data management systems like Cuppa, which lets you access information quickly, allowing for personalized responses to customer inquiries.
Utilize templates and canned responses to handle common questions swiftly, boosting your response efficiency.
Establish a clear response time policy to set team expectations and foster accountability. This approach improves service outcomes and guarantees quick interactions with customers.
Offering self-service options, such as FAQs, empowers customers to find answers independently, reducing wait times.
Finally, regularly monitor reply times through Objective Key Results (OKR) to identify improvement areas, streamlining your processes for consistently quick responses.
Incorporating fast response strategies not only enhances customer service efficiency but also provides a significant competitive edge. When you promptly address customer inquiries, you’re tapping into a powerful tool that boosts conversion rates by an astonishing 391%.
A quick response doesn’t just increase sales; it also builds trust, as over 90% of customers believe excellent service is defined by speed. This trust often translates into positive word-of-mouth, with 72% of customers sharing good experiences due to prompt service, enhancing your brand reputation.
Additionally, 78% of shoppers prefer engaging with responsive sellers, giving you a competitive advantage in capturing potential sales. Prioritizing rapid customer service helps you stand out from slower competitors, attracting more customers and solidifying your market position.

Swift action in minor emergencies is essential to prevent minor issues from escalating into major health concerns. Your ability to respond quickly to situations like small cuts or minor injuries can make all the difference.
Quick replies to these incidents help minimize not only physical harm but also anxiety. Each second counts, and a swift response can turn a potentially complex issue into a manageable one, reducing the need for extensive treatment.
Recognizing problems early and acting promptly can prevent complications such as infections. Equip yourself with basic first aid knowledge to enhance your confidence and response times.
Keep a well-stocked first aid kit and an accessible emergency contact list to efficiently manage minor emergencies, ensuring overall safety.
Imagine a world where every customer feels valued and heard. Quick response is your secret weapon, transforming customer satisfaction and building trust. This speed boosts sales, generating leads while enhancing your brand’s image. But how do you achieve fast response times? By embracing strategic approaches, you gain a competitive edge, ready to address minor emergencies with ease. The clock is ticking, and the choice is yours—will you seize the advantage or let it slip away?
You have to disclose any history of water damage when selling your house. If you fail to do so, you could face serious legal consequences, including financial penalties and potential lawsuits from buyers. Water damage can lead to significant repairs and reduce your property's value. Being transparent about such issues builds trust with potential buyers. It's crucial to document any repairs related to water damage and understand your disclosure obligations under the law. Curious to know more about your rights and responsibilities when it comes to water damage? There's plenty of important information to consider before you sell.
Water damage is a serious concern that can significantly impact your property's value and safety. It can lead to severe structural issues, mold growth, and health risks, making it crucial to understand its implications when selling your home.
In California, you need to be aware of latent defects and the importance of disclosing any existing water damage during a home inspection. Homeowners should also consider reviewing their insurance coverage for water damage to understand potential financial protections and responsibilities.
Common sources of water damage include poorly maintained roofs, old plumbing, and leaks from appliances. Repair costs can range from about $2,800 to over $10,000 for severe cases, so identifying the source is essential for effective remediation.
If you notice any signs of moisture, it's vital to act quickly, as water damage can attract pests like termites that further compromise your property's integrity.
You should also consider that homeowners insurance may cover certain repairs related to water damage, but exclusions often apply for existing conditions. Being proactive about addressing water damage and understanding its implications can save you from potential legal and financial troubles down the line.
Always prioritize thorough inspections and necessary repairs to maintain your property's value and safety.
Understanding your seller disclosure obligations is crucial when selling a home in California. You're legally required to disclose known material defects, including any history of water damage, as stated in the Transfer Disclosure Statement (TDS). This obligation ensures transparency and protects both you and potential buyers.
Here's a quick overview of your seller disclosure responsibilities:
| Disclosure Requirement | Details |
|---|---|
| Water Damage History | Disclose any past incidents of water damage. |
| Significant Repairs | Document major repairs related to water issues. |
| Mold Issues | Report any mold problems that arose from water damage. |
| Legal Repercussions | Non-disclosure can lead to legal action from buyers. |
| Transparency | Honesty in disclosure promotes trust in the home sale. |
If you fail to disclose known water damage when selling your house, you could face serious legal consequences.
Buyers have rights and remedies available to them, which may include seeking compensation for repairs and damages.
Understanding these implications can protect you from potential lawsuits and help you navigate the selling process more effectively.
Selling a house comes with a responsibility to disclose known issues, and ignoring this duty can lead to serious legal consequences. In California, as a seller, you must disclose any material facts, including a history of water damage. Failure to do so can result in legal action for non-disclosure or misrepresentation, which can be costly.
Concealing water damage not only risks your reputation but can also lead to significant financial penalties. Buyers may seek compensation for repair costs or reductions in property value due to your lack of disclosure. If they discover undisclosed water damage post-sale, they've the right to take legal action against you, making it essential to be transparent.
Intentionally hiding water damage can escalate the situation to allegations of fraud, complicating legal proceedings and potentially leading to harsher penalties against you. Additionally, buyers may claim emotional distress if they feel deceived.
In real estate transactions, honesty is crucial; the legal consequences of concealment can far outweigh any temporary benefits you might perceive from hiding such critical information. Protect yourself by being upfront about any water damage.
Buyers have specific rights when it comes to undisclosed water damage, and knowing these rights can help protect your investment. In California, the seller is required to disclose material facts, including any known water damage, as it can significantly affect property value.
If a home seller fails to disclose such information, you may pursue several remedies.
Navigating these issues can be complex, so it's crucial to consult with qualified real estate attorneys for legal advice tailored to your situation.
They can guide you through the legal implications of non-disclosure, ensuring you understand your buyer rights and remedies.
Many homeowners may not realize the subtle signs of water damage lurking in their property. Common indicators include discoloration on walls or ceilings, which often suggests leaks or moisture buildup.
If you notice a musty odor, that could signal visible mold growth, a direct result of undetected water damage. This poses serious health risks and requires immediate attention.
Additionally, warped or buckled flooring, particularly near bathrooms or kitchens, can indicate previous water exposure and potential structural issues.
Keep an eye out for stains on carpets or walls that persist even after cleaning; these may point to hidden water damage that needs further investigation.
If you've made repairs, it's crucial to disclose any history of water damage on your disclosure form. Being upfront about visible mold growth or past leaks not only protects you legally but also fosters trust with potential buyers.
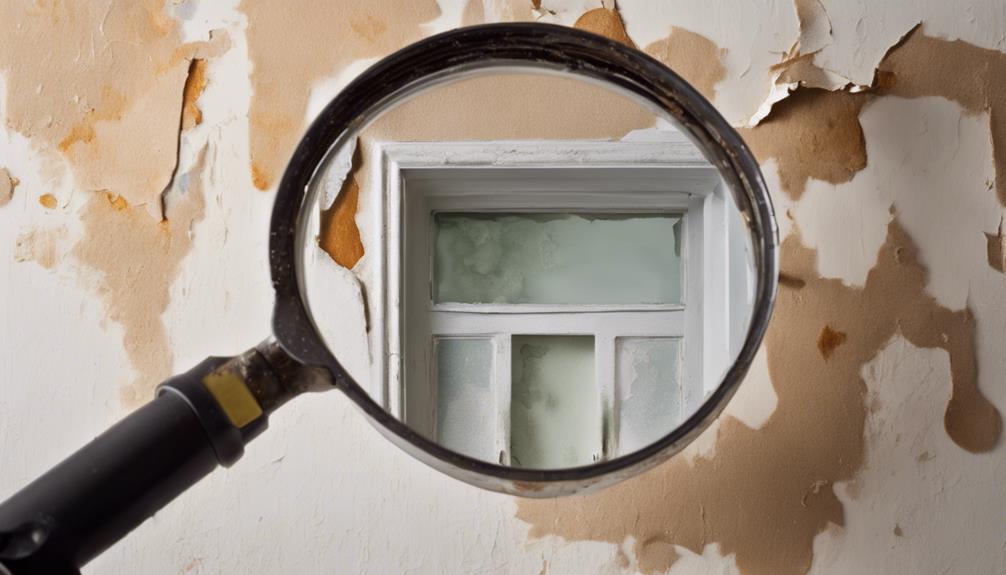
Investing in a comprehensive home inspection is essential for uncovering hidden issues, particularly those related to water damage. In California, while sellers are required to disclose known issues, many latent defects may remain hidden without a professional inspection.
By engaging an inspector before making an offer, you can avoid unexpected repair costs that average around $2,800 for water damage repairs.
Here are some key benefits of home inspections:
During inspections, be on the lookout for discoloration, musty odors, and other indicators of water damage.
A thorough inspection empowers you to make a sound investment and ensures that you're aware of the true state of the property.
Ultimately, a professional inspection can save you significant money and stress, making it an invaluable step in the home-buying process.
Understanding the seller's knowledge of any past water damage is vital when you're considering a property. Sellers are legally obligated to disclose known water damage if they're aware of it. If the seller knew about the damage and fails to disclose it, they could face significant legal consequences under California real estate law.
To establish this knowledge, look for evidence such as repair records, contractor testimony, or insights from neighbors. The seller's intent also plays a crucial role; proving they knowingly concealed water damage can bolster your claim for nondisclosure. Such documentation can indicate that the seller was aware of the issue, potentially substantiating your claims in any legal proceedings.
Additionally, professional inspections are essential. They help uncover any undisclosed water damage, which can further support claims against sellers for failing to disclose material defects.
If you discover water damage after purchasing a home, taking immediate legal steps is crucial to protect your rights.
Start by consulting a California real estate attorney who can guide you through your options. If you can prove that the seller failed to disclose the issue, you may have grounds for legal action. Evidence such as contractor testimony or repair documentation will be valuable in building your case.
Here are some steps to consider:
Once you've assessed your legal options after discovering water damage, it's important to explore potential remedies that can help mitigate your losses.
In California, you can seek compensation for repair costs related to undisclosed water damage, which typically averages around $2,800 but can exceed $10,000 based on damage severity.
Legal remedies available to you include claims for reduced property value due to undisclosed defects, and you might even seek recovery for emotional distress caused by the seller's nondisclosure.
Acting quickly is crucial, as California's statutes of limitations can limit your time frame for filing claims regarding non-disclosure.
Start with negotiation and mediation with the home sellers; these initial remedies often lead to compensation for necessary repairs without the hassle of litigation.
However, having an experienced real estate attorney can make a significant difference. They can provide you with essential guidance on your rights and the potential success of your claims concerning undisclosed water damage.
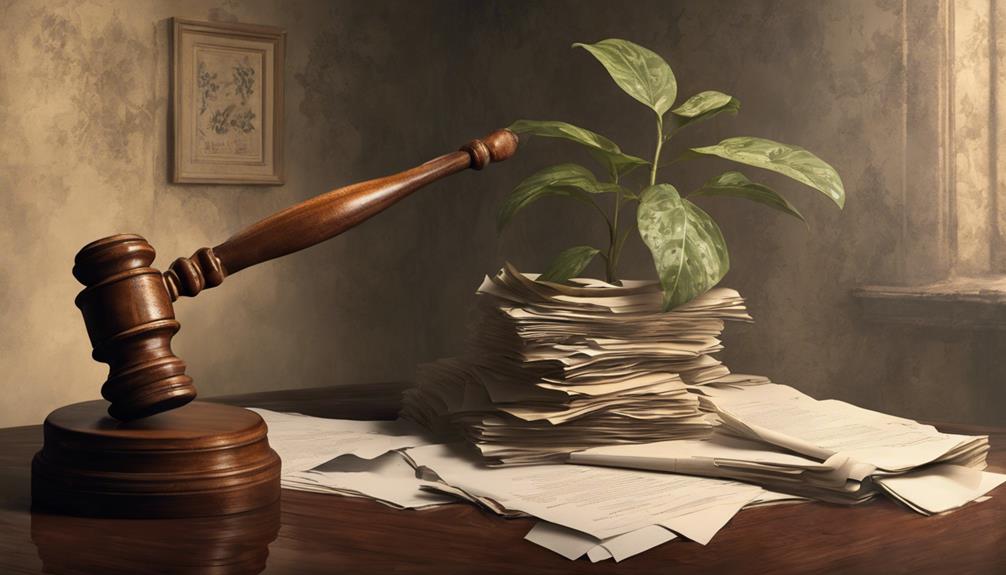
Navigating the complexities of disclosure laws can be daunting, especially when it comes to water damage. That's where legal representation becomes vital. An experienced attorney helps you comply with California Civil Code requirements, ensuring you disclose water damage properly. This guidance is crucial for preparing the Transfer Disclosure Statement (TDS) accurately, which can protect you from liability for undisclosed defects.
Consider these key points:
With legal representation, you can navigate the nuances of water damage disclosures confidently. You'll not only safeguard yourself against potential water damage claims, but you'll also ensure that your sale goes smoothly.
Understanding your responsibilities and having someone to guide you through the process helps mitigate risks associated with undisclosed defects. Ultimately, having an experienced attorney by your side can make a significant difference in protecting sellers' interests throughout the sale.
Yes, water damage significantly affects your home's value.
It can lead to lower home appraisals and negative buyer perception, making potential buyers wary. Repair costs can easily exceed $2,800, impacting your ability to negotiate.
Additionally, insurance implications may arise, complicating the sale. Market trends show homes with water damage struggle during property inspections, often requiring a lengthy remediation process, which further diminishes their worth in the eyes of prospective buyers.
If you're selling a property, you've got seller responsibilities that include adhering to disclosure laws.
Failing to disclose defects can lead to legal implications, including potential lawsuits from buyers. They're protected by laws that require transparency, and property inspections often reveal hidden issues.
Ethically, you should disclose known problems to avoid complications. Offering home warranties can help mitigate concerns but doesn't replace the need for honesty about defects that could impact the buyer's decision.
When selling a house in California, you've got to adhere to strict disclosure requirements.
Your seller obligations include revealing the property's condition, any inspection reports, and potential environmental hazards.
Buyers have rights to know about significant defects, so be honest about issues like structural damage or past repairs.
Failing to disclose could lead to serious legal implications, including lawsuits.
Transparency not only protects you but also fosters trust in the transaction process.
You need to understand the importance of damp in your home.
It's crucial to know damp detection methods and damp inspection importance before selling.
Consider damp prevention tips to avoid issues, especially in basements.
If you've dealt with damp, explore damp repair solutions to ensure a healthy environment, as damp health risks can affect buyers.
Remember, having damp insurance coverage can help protect you if problems arise after the sale.
Transparency is key!
When selling your house, it's crucial to disclose any water damage. Not only does it protect you legally, but it also fosters trust with potential buyers. Ignoring this obligation can lead to serious legal consequences and financial losses. By being transparent and conducting thorough inspections, you can avoid disputes down the line. Always consider getting legal representation to guide you through the process and ensure you're meeting all disclosure requirements. Your honesty can make a big difference!
To talk to an insurance adjuster about water damage, start by gathering your documentation. Take clear photos of the damage and log the details of your interactions. Know your policy—understand what's covered and any limitations. When you connect with the adjuster, calmly share your evidence and discuss the source of the water. Ask questions about the claims process and coverage specifics. It's also smart to keep a record of everything discussed. Staying organized and informed will help you negotiate effectively. If you keep going, you'll discover more tips for navigating this complex process.
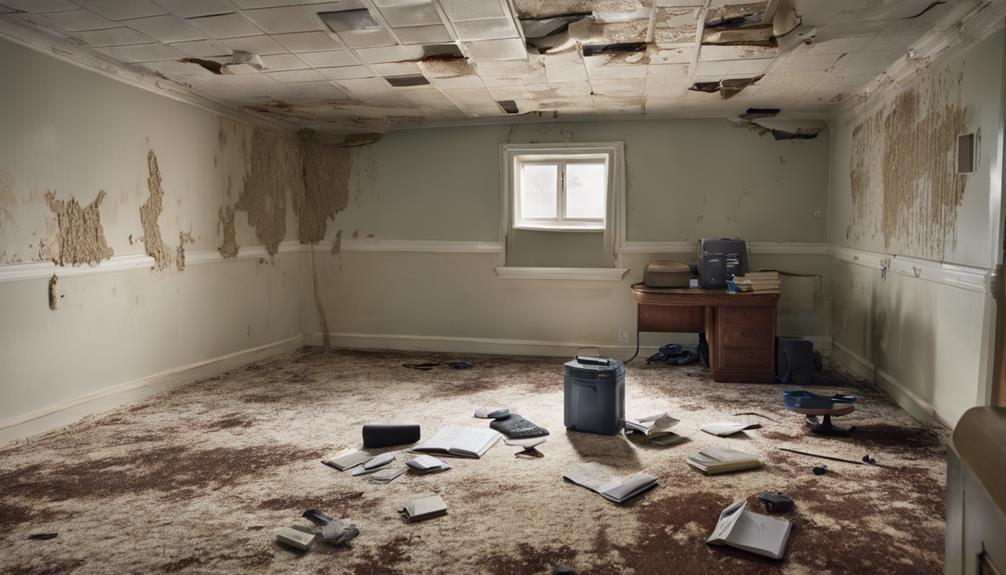
What should you do first after experiencing water damage? Start by identifying the source and, if it's safe, stop the flow, like shutting off the main water valve.
Next, document the damage thoroughly. Capture detailed photographs and videos of the affected areas and items; these will serve as crucial visual evidence for your insurance claim. It's also important to review your insurance policy for coverage details, as understanding your insurance coverage for water damage can help you navigate the claims process more effectively.
Once you've documented the damage, it's time to mitigate further damage. Dry wet areas and ensure proper air circulation to prevent mold growth, which can start within 24-48 hours.
After taking those initial steps, contact your insurance company promptly. Most providers offer 24/7 claim reporting, allowing you to kick off the insurance claim process without delay.
As you progress, keep thorough records of all actions taken. Save receipts for any temporary repairs or mitigation efforts, as these will support your claim submission when the claims adjuster reviews your case.
Understanding your insurance coverage is crucial after experiencing water damage. Start by reviewing your insurance policy to identify the specific coverage limits and exclusions related to water damage claims. Many policies only cover sudden and accidental incidents, while neglect or gradual damage may not be included. In fact, 25% of home insurance claims were due to water damage in 2018, so grasping your coverage is vital.
Typically, coverage for water damage from non-flood sources is included in standard policies, but it's essential to double-check your policy for details. Familiarize yourself with the difference between Actual Cash Value (ACV) and replacement cost coverage, as this affects the payout you'll receive for damaged items.
When obtaining repair estimates, ensure you have a clear understanding of what your policy covers. Additionally, if your home becomes uninhabitable due to water damage, your policy might cover additional living expenses, so look for any related provisions.
When negotiating settlement offers, being well-informed about your insurance coverage and limitations will empower you to advocate effectively for your needs.
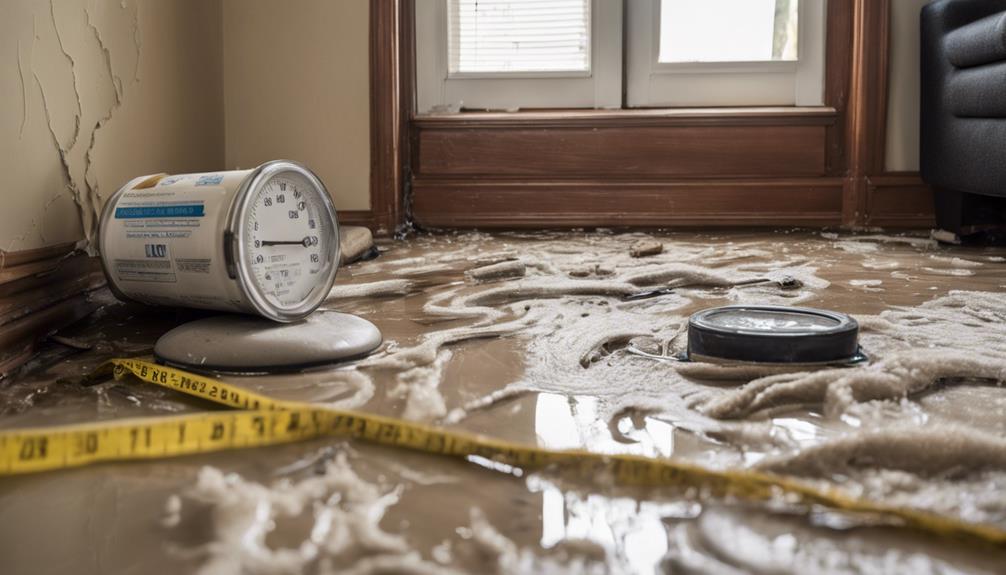
How can you ensure your water damage claim is processed smoothly? Start by thoroughly documenting water damage. Capture clear photographs and videos of all affected areas and items, making sure every detail is visible for the claims process. This visual evidence is crucial when you communicate with the insurance adjuster.
Next, maintain a detailed log of all interactions with the insurance company. Note the dates, times, and names of representatives you speak with; this can support your claim later. Don't forget to keep receipts related to any damage mitigation efforts, such as temporary repairs and professional cleaning services, as these documents will help you seek reimbursement.
As you assess the damage, document any visible and unseen issues over time, especially areas prone to mold or deterioration that might escape the adjuster's initial inspection.
Lastly, provide a comprehensive statement detailing the extent of the damage. Include descriptions of affected materials, their conditions, and a list of necessary repair work. This thorough approach will help prevent any additional damage to your claim and ensure a smoother process with your insurance company.
Once you've documented the water damage thoroughly, the next step involves effectively communicating with the insurance adjuster. Clear and direct communication can significantly impact your water damage claim outcome. Here are three key points to keep in mind:
Remember to maintain a professional and respectful demeanor during discussions. It fosters better communication and cooperation with the adjuster.
Additionally, keep a log of all interactions, noting dates, times, and content of conversations. This documentation can be invaluable in tracking your insurance claims and understanding the claims process, ultimately leading to a satisfactory settlement offer.
Asking the right questions during your conversations with the insurance adjuster can make a big difference in your claim process.
Start by inquiring about the timeline for receiving payment advances for both structural and content damage. This information can significantly impact your restoration efforts.
Next, ask for a precise estimation of the building loss amounts, so you understand the potential coverage you can expect for repairs.
It's also essential to seek clarification on specific coverage details and limitations in your homeowners policy. Knowing what's included in your water damage claim is crucial.
Confirm who'll assist you in detailing claims for all damaged items; this can help streamline the process and ensure all losses are accounted for.
Navigating the claims process can feel overwhelming, but knowing the steps to take can simplify it significantly. Here's a quick guide to help you through:
Throughout this process, maintain open communication with the adjuster. Provide any requested information promptly and keep detailed records of all interactions.
If the initial settlement offer seems low, don't hesitate to negotiate using your documentation. Remember, adjusters often rely on pricing guides that may not reflect local repair costs accurately, so advocate for yourself to ensure you receive fair compensation.

When handling disputes and settlements, it's crucial to understand your coverage terms and know exactly what damages you need to document.
If you receive a settlement offer that seems low, gather evidence to negotiate effectively.
Keeping detailed records of all interactions with the adjuster will also strengthen your position.
Understanding coverage terms in your insurance policy is crucial for effectively handling disputes and settlements with an adjuster. Knowing these terms will empower you to advocate for yourself during negotiations. Here are three key aspects to consider:
If disagreements occur regarding the settlement amount, don't hesitate to consult a public adjuster. They can help negotiate a fair resolution based on your coverage terms.
Always be prepared to present solid evidence of the damage, like photographs and repair receipts, to strengthen your case. By being well-informed and proactive, you'll increase your chances of a successful outcome when dealing with your insurance adjuster.
Thoroughly documenting damage is essential for a successful insurance claim, especially when disputes arise. Start by taking detailed photographs and videos of the water damage, ensuring you capture the extent of the destruction, including hidden areas. This visual evidence will support your claim effectively.
Don't forget to keep a record of all communications with the insurance company, noting dates, times, and the names of representatives. This creates a clear timeline of your interactions, which can be vital during disputes.
Additionally, maintain receipts for all expenses related to mitigation efforts, like temporary repairs and professional cleaning. These costs may be eligible for reimbursement in your settlement. Document the damages with descriptive notes, highlighting specific issues such as mold growth or structural damage. This information is crucial for the adjuster's evaluation.
If a dispute arises regarding the settlement amount, be prepared to present your documented evidence, including estimates from contractors and detailed lists of damaged items. This thorough documentation will strengthen your position and help you negotiate a fair resolution to your claim.
Negotiating settlement offers can feel daunting, but it's crucial to approach the process with confidence and preparation. Understanding your position can make a significant difference in the outcome. Here are three key steps to help you navigate the negotiation process effectively:
If the initial settlement offer seems insufficient, calmly present your evidence to advocate for a higher payout.
When you're dealing with challenges in your insurance claims, seeking additional resources and support can make a significant difference.
If you're facing difficulties with your insurance company regarding water damage claims, consider reaching out to the California Department of Insurance. They regulate the insurance industry and can help protect your rights during claims disputes.
Utilizing a public adjuster can also be beneficial; these professionals have expert negotiation skills and understand homeowners insurance policies inside and out, potentially maximizing your claim payouts.
It's essential to keep thorough documentation of all interactions with your insurance company. This documentation can support your claims and help resolve disputes effectively.
If you encounter unfair treatment or misconduct from insurance agents, report it to the California Department of Insurance. They offer resources for understanding your insurance-related inquiries.
Additionally, take advantage of free consultations often available for homeowners navigating the claims process. This support can guide you toward obtaining any additional compensation you may deserve.
With the right resources, you can effectively tackle your water damage claims and navigate the complexities of the insurance landscape more confidently.
When talking to a home claims adjuster, avoid common mistakes like admitting fault or discussing emotional responses.
Don't let adjuster tactics throw you off; stick to the facts. Factual inaccuracies can hurt your claim, so be clear and precise.
Watch for documentation errors and don't overlook your policy limits.
Always have repair estimates ready, and don't rush through claim timelines—patience can lead to a better outcome for your situation.
Insurance for water damage typically covers sudden incidents, like burst pipes, under water damage coverage.
When filing a claim, be aware of the types of water damage; clean water is usually covered, while gray and black water may have exclusions.
Documenting proof of damage is crucial, as is understanding deductible considerations and restoration costs.
Know the claim filing process and timeline expectations to navigate your policy exclusions effectively and ensure a smoother experience.
Your water damage claim might be denied for several common reasons.
If you've got maintenance issues or fail to report the damage in a timely manner, that could lead to problems.
Policy exclusions can also come into play, especially if the damage falls under lack of coverage.
Improper documentation or prior claims might raise red flags, while negligence claims could further complicate your situation.
Always ensure you understand your policy to avoid these pitfalls.
To make a successful water leak claim, start by documenting the damage thoroughly.
Gather your repair estimates and keep all receipts handy.
Review your policy coverage to understand what's included.
Adjust your expectations based on timeline factors, as claims can take time.
Provide clear documentation tips, like photos and logs of communications.
In conclusion, talking to an insurance adjuster about water damage doesn't have to be overwhelming. By understanding your coverage, documenting everything, and asking the right questions, you'll be better prepared to navigate the claims process. Remember, clear communication is key to resolving any disputes and securing a fair settlement. Don't hesitate to seek additional resources if you need help. You've got this, and your home deserves the best care!
If a plumber causes water damage in your home, start by assessing the situation and documenting the damage with photographs. Reach out to the plumber immediately, explaining what happened and documenting all communications. Don't forget to notify your insurance company to start the claim process promptly. Move any salvageable belongings to a dry area and consider hiring a restoration professional to mitigate further damage. Review your homeowner's insurance policy and understand your rights regarding plumber liability. With these steps, you'll be better prepared to handle the situation effectively and protect your interests. There's more to explore on this topic!
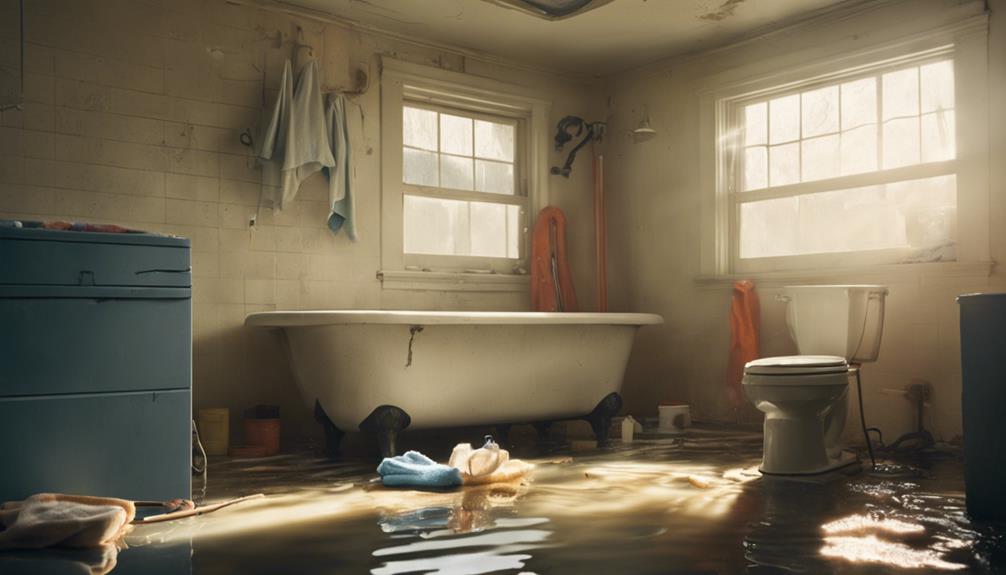
When faced with water damage from a plumber's mishap, the first step is to quickly assess the situation. Start by identifying the visible signs of water damage in your home, like water stains on ceilings, damp walls, or wet floors. These indicators help you assess the extent of the damage and prioritize your response.
It's important to document the damage through photographs and descriptions, as this can aid in the insurance claims process, especially if you have insurance coverage for water damage.
Next, locate the water source. If it's still leaking, turn off the main water supply to prevent further issues. While doing this, don't forget to check potential hazards, especially electrical risks. Water exposure can compromise outlets and wiring, so ensure safety first.
After addressing immediate concerns, evaluate the structural integrity of the affected areas. Look for any compromised beams or supports; these could pose serious safety risks.
If you spot any issues, it's crucial to act quickly, as structural damage can escalate.
Reach out to the plumber right away to let them know about the water damage caused during their service.
Be sure to document all your communications, including dates and details, so you have a clear record of the situation.
This will help ensure they take responsibility and have the chance to fix the issue.
Water damage can be a frustrating and stressful situation, especially when it results from plumbing work. Your immediate communication with the plumber is crucial. Start by contacting them as soon as you notice the issue. Explain the water damage in detail, highlighting the extent of the damage, including any visible signs like water stains or structural concerns. This clarity helps the plumber grasp the seriousness of the situation.
As you communicate, make sure to document all communications, noting the dates and times of your calls or messages. This record not only tracks your efforts but can also support any future insurance claims or legal actions.
Give the plumber a chance to respond and address the issue. They may have solutions or be willing to send a technician to assess the damage firsthand.
Keep a close eye on their response time and any actions they take. This information can be vital for your records, especially if you need to escalate the matter later on.
Documentation is essential in managing the aftermath of water damage caused by plumbing work. Start by immediately contacting the plumber responsible for the job. Inform them about the water damage, providing specific details about what you've observed. Clearly communicate the extent of the damage, including visible water stains, any structural issues, or affected materials.
Allow the plumber a chance to respond to the issue; they might offer to fix the problem or guide you on the next steps. During this interaction, it's crucial to document everything. Keep a record of all communications with the plumber, noting dates, times, and the content of your discussions. This documentation will be invaluable, especially if you need to file insurance claims or take legal action later.
Additionally, track the plumber's response time and any actions they take to address the problem. This information can bolster your case if disputes arise.
Effective documenting not only helps you manage the current situation but also ensures you have a solid foundation for any future claims or communications regarding the water damage.
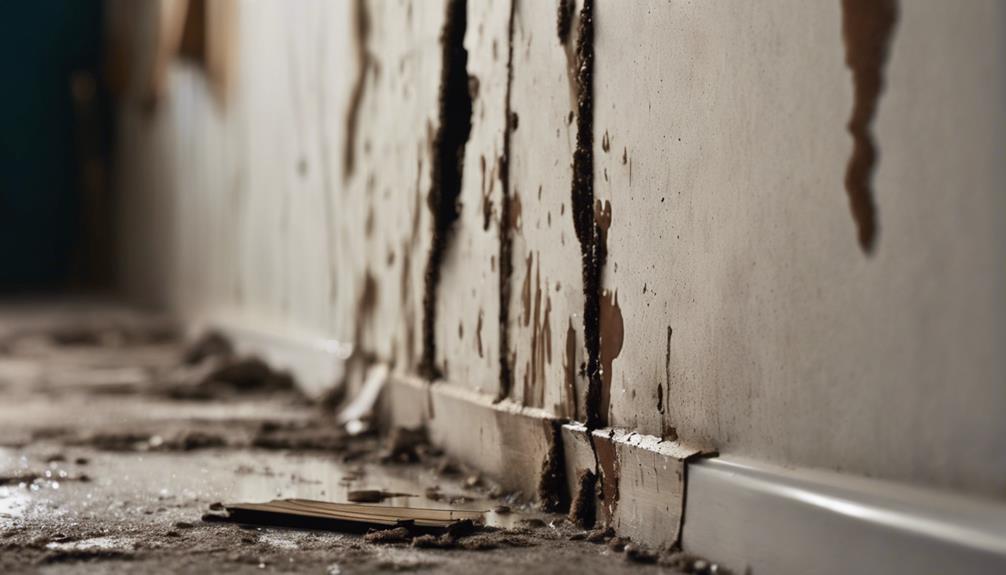
When water damage occurs, documenting the situation is crucial for a successful insurance claim.
You'll want to capture clear photos and videos of the affected areas and keep a detailed log of your observations.
Gathering all this evidence promptly will help streamline the reporting process and support any reimbursement claims.
How can you ensure that your insurance claim is successful after experiencing water damage caused by a plumber? The key lies in thorough documentation. By keeping detailed records, you can substantiate your insurance claims and protect your coverage.
Here are four crucial steps to follow:
Being organized with your documentation not only helps you navigate the claims process but also ensures you're informed about what's needed for coverage verification and damage assessment.
Taking these steps can significantly improve your chances of a successful claim.
To support your insurance claim effectively, gathering the right types of evidence is vital. Start by taking clear and detailed photographs of the water damage. Capture multiple angles and document the extent of the affected areas to serve as visual evidence. This documentation will be crucial in demonstrating the severity of the situation.
Next, maintain a written log that outlines the timeline of events. Include when you discovered the damage and any communications with the plumber regarding the issue. This record will provide context for your claim.
Collect receipts and invoices for any immediate mitigation efforts, like water removal or repair services. These will support your claim for damages.
Don't forget to gather any relevant correspondence with your insurance company, including claim numbers and representative names, to show your proactive approach.
If possible, include video evidence that shows both the damage and the plumbing work that caused it. This can offer a more comprehensive understanding of the situation for your insurance claim.
Documenting water damage promptly is crucial for a successful insurance claim. Following timely reporting procedures ensures you have the evidence needed for your homeowners insurance policy.
Here's how to effectively document the damage caused by the plumber:
Organizing and storing all documentation in one place can significantly aid in the claims process with your insurance company.
Once you've identified water damage caused by a plumber, it's crucial to notify your insurance company promptly. Contact your homeowners or renters insurance as soon as possible to report the incident and initiate a claim process.
Be prepared to provide comprehensive details about the damages, including the plumber's contact information, the nature of the damage, and any documentation you've collected, like photos or invoices.
Inquire specifically about the coverage for repairs and replacements related to contractor-caused water damage, as insurance policies can vary significantly in their inclusivity. Understanding your coverage will help you gauge what expenses might be covered and what you may need to pay out of pocket.
Follow the insurance company's guidance closely on the next steps, such as scheduling an inspection or making any adjustments to your claim.
It's essential to keep thorough records of all communications with your insurance provider, including dates, times, and the names of representatives you speak with. This documentation will support your claim and ensure a smoother claims process.
Prompt action and clear communication can make a significant difference in how quickly you receive assistance for the damages.
Once you've stopped the water flow, it's crucial to assess the damage right away.
Contact your insurance company to report the incident and document everything thoroughly for your records.
This proactive approach will help you navigate any claims and ensure you're protected from further loss.
When faced with water damage caused by a plumber's mishap, it's crucial to act swiftly to prevent further issues.
Start by assessing the immediate impact of the situation. Here's what you should do:
Additionally, move any salvageable items to a dry location and use towels or a wet/dry vacuum to remove standing water.
By taking these steps, you'll not only minimize the damage but also create a clear record of the incident, which might be helpful later on.
Acting quickly can save you from more extensive repairs down the line.
Water damage can be overwhelming, but contacting your insurance company promptly is essential to prevent further complications.
Start by reaching out to your homeowners or renters insurance to report the water damage caused by the plumber. Make sure to provide them with all relevant details, including the plumber's contact information.
It's crucial to inquire about the specific coverage for water damage in your policy, as these details can vary, especially concerning contractor-related incidents.
Once you've reported the damage, follow the guidance provided by your insurance company. They'll instruct you on how to proceed with filing a claim and any necessary water damage restoration steps.
Keep a detailed log of all communications with your insurance provider, such as dates, times, and the names of representatives you speak to. This log will help you track the progress of your claim and ensure that you have a clear record of your interactions.
An insurance adjustor will likely visit to assess the damage, so being prepared with documentation can only strengthen your case. Taking these steps will help you navigate the process efficiently and minimize further damage to your home.
After contacting your insurance company, it's time to focus on documenting everything thoroughly to prevent further damage.
This documentation will be vital for your claims process and any potential disputes with the plumber.
Here's how to ensure you have solid evidence of the damage:
In the wake of water damage caused by a plumbing mishap, calling a restoration professional is crucial for minimizing further issues.
An experienced restoration contractor can provide a quick response to mitigate the damage, ensuring that your property doesn't suffer more than necessary. They utilize specialized equipment for effective water extraction and drying, significantly reducing the risk of mold growth.
These professionals are trained in water mitigation techniques, allowing them to preserve salvageable materials while safely removing those that are unsalvageable.
Their expertise not only helps in restoring your property but also adheres to industry standards and protocols, which can be vital for your insurance claims.
Engaging a restoration company can facilitate smoother communication with your insurance provider, as they'll provide necessary documentation and assessments.
Understanding your rights as a homeowner is essential when dealing with water damage caused by a plumber's negligence. You might be entitled to compensation through your homeowners insurance policy. Here's what you should consider:
If the job isn't completed satisfactorily or damage occurs, you have grounds for disputing payment or even pursuing legal action.
Knowing your rights and taking proactive steps can help you navigate this challenging situation effectively.
Knowing your coverage is vital when dealing with water damage from a plumber's negligence. Your homeowners insurance typically covers such damage, but it's essential to review your policy specifics to understand the extent of your coverage. This includes repair costs, cleanup, and restoration expenses, which depend on the terms outlined in your policy.
Be aware that some policies may exclude damage resulting from poor workmanship. This makes it crucial to verify your coverage limits with your insurance agent. Regularly reviewing your homeowners insurance policy ensures you have adequate protection against incidents caused by contractors.
In addition to understanding your policy, it's a good idea to document all communications and details of the damage before filing a claim. This documentation will help facilitate the claims process and provide necessary evidence to your insurance provider.
If the plumber has contractor liability insurance, it may also be beneficial to explore that avenue for compensation. Ultimately, knowing your coverage can make a significant difference in how you handle water damage and any financial implications that arise.
When dealing with water damage caused by a plumber, seeking legal advice is crucial for protecting your rights and exploring potential claims against the contractor. Consulting a legal professional can help you understand the complexities surrounding contractor liability insurance and your homeowners insurance coverage.
Here are some key steps to take:
After addressing the legal aspects of water damage caused by a plumber, the next step is ensuring you hire a reputable professional for any future plumbing needs.
Start by researching potential plumbers in your area. Check online reviews, ratings, and referrals to gauge contractors' reputations. A solid reputation often indicates quality work and reliability.
It's crucial to verify information about the plumber you're considering. Confirm they carry adequate liability insurance and workers' compensation insurance. This coverage protects you from potential damages or injuries during the job.
Don't hesitate to request and review their credentials, including licenses and certifications, to ensure their qualifications are legitimate.
Before any work begins, ask for a detailed estimate outlining all costs involved. This step helps avoid unexpected expenses and ensures clarity on the scope of services provided.
When a plumber makes a mistake, like negligent plumbing, it can lead to serious issues, including leaks and water damage.
You might face liability issues if the damage is extensive. It's crucial to understand your homeowner rights; you could file insurance claims to cover repair costs.
Document the damage and consider preventative measures for the future. Open communication with the plumber may help resolve the situation before escalating it further.
Yes, water damage can be fixed in your house.
The restoration process typically involves water extraction, drying, and repairs to affected areas. You should consider professional services, as they use specialized equipment for thorough drying.
Don't forget to review your homeowner rights; insurance claims might cover some costs, especially if negligence is involved.
Also, remember to follow prevention tips to avoid future issues, ensuring your home stays safe and dry.
To fix water pipe damage, start by using effective pipe repair techniques.
Shut off the water supply and assess the damage.
Employ water extraction methods to remove excess moisture, followed by drywall replacement tips if needed.
Implement mold prevention strategies to safeguard against future issues.
Document everything for the insurance claim process, and ensure you maintain your plumbing system regularly to prevent future leaks.
With these steps, you can restore your home efficiently.
Yes, a broken pipe can definitely cause significant water damage.
When you experience pipe leaks, it's crucial to act quickly. Water restoration efforts can prevent further property damage and reduce repair costs.
Contact an emergency response team to address the leak immediately. Remember, plumbing insurance often covers these incidents, but you'll need to document everything for a successful claim.
Don't wait too long, as mold can develop within days!
When a plumber causes water damage, it's crucial to act quickly. Assess the situation, document everything, and reach out to your plumber and insurance company right away. Don't forget to prevent further damage and know your rights. Understanding your coverage can save you a lot of stress, and if necessary, seek legal advice. Lastly, for future plumbing needs, always hire a reputable plumber to avoid similar issues. Take these steps, and you'll be on your way to recovery.