
Mold reproduces by releasing spores that thrive in moist environments, needing high humidity and poor ventilation to grow. Common indoor molds, like Aspergillus and Penicillium, can cause respiratory issues and worsen asthma. To prevent mold, keep humidity below 60%, fix leaks, and guarantee good ventilation. If mold’s present, wear protective gear for cleanup or consult professionals for severe cases. Understanding these factors helps you manage mold effectively and safeguard your health and surroundings as you learn more about it.
Mold, a fascinating yet potentially troublesome fungus, reproduces by releasing tiny spores into the air. These spores settle on damp surfaces, which are ideal conditions for mold growth. High humidity and moisture levels above 60% provide the perfect environment for spores to germinate.
Once they find a suitable spot on organic matter, like wood or fabric, they develop into multicellular filaments called hyphae. These hyphae form a network known as mycelium, enabling mold to reproduce rapidly. A single colony can produce millions of spores quickly, posing significant health risks if mold proliferates indoors. Timely restoration of water damage is essential to prevent such growth and protect health.
While mold decomposes organic matter in nature, its presence in your home can lead to respiratory issues and other health problems, necessitating prompt attention and remediation.
When it comes to mold growth in homes, moisture is the primary culprit, often lurking in unexpected places. You might notice it in the form of water leaks or condensation in high humidity areas like bathrooms and kitchens.
If your home’s relative humidity levels hover above 60%, you’re creating a perfect environment for mold spores to thrive. These spores find nutrients on organic materials such as wood, paper, and fabric.
Poor ventilation can trap this humidity, further encouraging mold growth, especially in basements and attics. This unchecked mold can have serious health impacts.
To combat this, quickly address any water damage and keep indoor humidity below 55%. Doing so considerably reduces the risk of mold proliferation, protecting both your home and health.
You’re likely to encounter several types of mold in indoor environments, each with unique colors, textures, and associated health risks.
For instance, Aspergillus can thrive in HVAC systems, posing health risks, especially to those with weakened immune systems, while Cladosporium, often found on decaying plants, can trigger asthma flare-ups in damp areas.
Recognizing these molds and understanding their potential effects on health is vital for maintaining a safe and healthy indoor space.
Although mold is a common household issue, understanding the types you’ll likely encounter indoors can help manage their impact.
Various mold species thrive in indoor environments, especially where there’s water damage. Aspergillus is often found on dust and food, and can release mycotoxins, posing health issues through mold exposure.
Cladosporium, residing on fabrics and wood, can trigger mold allergies, especially in asthma-prone individuals.
Penicillium grows in damp areas like basements, often after water damage.
Alternaria, typically from soil, is another culprit for allergic reactions.
Finally, Stachybotrys, or black mold, thrives in moist conditions, producing dangerous mycotoxins.
Recognizing these indoor mold types can help you better manage health risks and maintain a safer home environment.
Identifying the colors and textures of mold in your home provides insights into the specific species you’re dealing with and the conditions they’re thriving in.
Mold colors can range from black, green, white, yellow, to blue, each hinting at different species and environments. For instance, Cladosporium appears greenish or black, often gracing fabrics and wooden surfaces in varied temperatures.
Aspergillus, with its fuzzy texture, lurks on dust, food, and building materials, sometimes producing harmful mycotoxins. Penicillium is typically blue or green, velvety, and loves water-damaged spots.
Meanwhile, Stachybotrys, or black mold, stands out as a dark greenish-black presence in damp areas, releasing mold spores that can be dangerous.
Knowing these distinctions helps you understand and address mold issues effectively.
When considering the health risks posed by indoor molds, it’s vital to understand the types commonly found in homes.
Mold grows in various environments, and exposure can lead to serious health issues. Aspergillus, Cladosporium, and Penicillium are prevalent indoors. Aspergillus often inhabits HVAC systems and produces mycotoxins that threaten those with weakened immune systems.
Cladosporium lurks in damp fabrics and wood, exacerbating asthma and causing symptoms such as sneezing. Penicillium appears on water-damaged surfaces, leading to allergic reactions and respiratory problems.
Stachybotrys, or black mold, thrives in wet areas, producing dangerous mycotoxins linked to severe health concerns, including respiratory distress.
To maintain health, it’s important to prevent mold growth by controlling moisture and ensuring proper ventilation.

If you’re worried about mold exposure, it’s important to understand the health risks it poses. Mold can cause significant health issues, especially for those sensitive or with pre-existing respiratory conditions.
Mold exposure can lead to respiratory problems like coughing and wheezing. Certain molds produce mycotoxins, which can be particularly dangerous, affecting your health in several ways:
Long-term exposure is linked to chronic respiratory conditions, highlighting the importance of addressing mold promptly.
How can you tell if mold is lurking in your environment? Begin by trusting your senses. A musty or earthy smell in your indoor air often hints at mold growth.
Look for visual signs, like green, black, or yellowish stains on walls or ceilings. These could indicate hidden mold behind damp surfaces. High humidity levels, especially above 70-75%, can foster mold proliferation.
Regular cleaning helps, but it’s essential to monitor areas like gypsum wallboard and vinyl coverings that trap moisture. Identifying moisture sources is vital since they contribute to mold growth and potential health impacts.
If you suspect mold, professional assistance might be necessary to effectively address and remediate the issue, ensuring a healthier living environment for you and your family.
To effectively prevent mold growth in your home, it’s important to manage moisture levels diligently. Keeping indoor humidity below 60% is essential, as higher levels foster mold-friendly conditions.
Regular inspections and prompt repairs of leaks in roofs, pipes, and foundations are critical for reducing unwanted moisture. Using dehumidifiers, especially in moisture-prone areas like basements and bathrooms, helps keep conditions dry and mold-free.
Proper ventilation also plays a key role in preventing mold growth.

While mold can be a persistent problem, managing and remediating mold-infested areas begins with swiftly identifying and addressing moisture sources.
Fix leaks and reduce humidity immediately, as mold thrives in damp environments.
During cleanup, wear protective gear like gloves, masks, and goggles to prevent health risks from mold spores.
Use diluted bleach solutions or commercial mold removers on non-porous surfaces.
For porous materials, consider removal if they’re heavily infested.
After cleanup, guarantee proper ventilation, and use dehumidifiers to keep indoor humidity below 60%, which helps prevent mold from returning.
If the mold problem is extensive or persistent, consult professional remediation services.
They’ve the expertise and equipment to effectively handle significant mold issues and guarantee your health remains protected.
You’ve learned how mold can sneak into your home and the health risks it poses. Coincidentally, by understanding its growth factors, you can take charge and prevent it. Identifying mold early is vital, so keep an eye out for signs. With the right strategies, you can manage and remediate any mold issues effectively. Remember, maintaining a dry and well-ventilated environment is your best defense against mold, ensuring a healthier living space for you and your loved ones.
After flood damage, start by evaluating structural safety, then consult a qualified inspector. If it’s safe, document all damage with photos for insurance. Hiring professional restoration services guarantees quick water removal and thorough drying, preventing DIY mishaps. Remove damaged materials, like drywall and insulation, and use dehumidifiers to properly dry areas. Consider drainage solutions like sump pumps and French drains for future protection. For durable renovations, prioritize waterproofing and maintain regular checkups. Explore effective strategies to safeguard your home.

When floodwaters recede, it’s vital to assess the structural damage and guarantee safety before diving into repairs. Start by inspecting floors, walls, and foundations for any signs of weakening, as standing water can seriously compromise structural integrity.
To conduct a thorough assessment, consult a qualified building inspector or structural engineer to identify potential chemical, sewage contamination, and electrical hazards.
Before you enter your flooded home, prioritize safety precautions. Turn off electricity and don protective gear like gloves and boots. Keep small children and pets away from damaged areas until a complete safety check is completed.
Document all damages with photos and detailed lists—this will be important for your insurance claims and planning future repairs. Taking these steps helps secure your home’s recovery. Additionally, consider contacting a professional restoration service for prompt response to ensure a thorough evaluation and effective recovery process.
Engaging professional restoration services is vital after flood damage, as these experts bring the know-how and tools needed to tackle the aftermath efficiently.
They understand the complexities of flood damage and provide significant professional help to secure your home’s safety and recovery. Certified teams can quickly assess and document the destruction, streamlining communication with your insurance company and preventing mold growth through effective mold remediation.
Consider these benefits of hiring professionals:
After securing professional restoration services, turning attention to removing water-damaged materials is the next logical step in your flood recovery process.
Start by cutting at least one foot above the waterline on drywall to prevent mold growth and guarantee the area dries thoroughly. It’s vital to remove saturated insulation, as it traps moisture, causing mildew and contaminating air quality.
Flooring types like laminate, hardwood, carpet, and tile should be taken out to address subfloor issues and stop further mold development. Open walls to expose wood studs and drywall, allowing them to dry and prevent hidden mold growth. Additionally, it’s essential to document damage for your insurance policy claims, ensuring you meet health and safety standards throughout the process.

To guarantee your home fully recovers after a flood, it’s crucial to focus on thorough drying and dehumidification.
Moisture content left unchecked can lead to mold growth within 24-48 hours, risking structural integrity.
Follow these steps to guarantee a successful drying process:
Finally, consider applying mold inhibitors to safeguard against future mold outbreaks.
When evaluating your home’s electrical and HVAC systems after a flood, it’s vital to prioritize safety and functionality.
Begin by hiring a licensed electrician to inspect your electrical systems for water damage. Look for compromised wiring, panels, and outlets. Replace any damaged components to prevent potential hazards. Flood damage can severely affect these systems, so thorough assessment is necessary.
Next, turn your attention to the HVAC systems. Flood waters may lead to issues like mold growth in heat registers and ducts. Inspect and clean these areas to maintain air quality and avoid spreading contaminants.
Document every inspection and repair, as this information is important for insurance claims and future reference. By taking these steps, you’ll guarantee a safer and more functional home environment.
Though flood damage can be devastating, planning for durable and flood-resistant renovations gives you an opportunity to create a more resilient home.
Start by choosing flood-resistant materials like concrete, brick, or treated wood, which withstand water exposure and minimize future damage.
Don’t forget to check moisture levels with a moisture meter, ensuring these materials maintain their integrity over time.
Waterproof coatings and sealants on foundations and exterior walls are essential for protecting structural integrity and reducing maintenance costs.
Here’s a quick checklist to guide your renovation:

To protect your home from future flooding, start by installing an effective drainage system, such as French drains or surface drains, to redirect water away from the foundation.
Choose high-quality waterproofing materials like sealants and membranes to safeguard your basement or foundation against water intrusion and mold growth.
Regularly maintain gutters and downspouts, and consider adding sump pumps to actively manage excess water during heavy rains, ensuring your home stays dry and secure.
A well-designed drainage system is essential for safeguarding your home against flood damage, and several key components can make a significant difference.
Effective drainage system installation not only reduces flood risks but also impacts your homeowners insurance positively. Here’s how you can enhance your home’s defense against water threats:
These steps help protect your home and potentially lower insurance costs.
When choosing waterproofing materials, understanding the different options available can make a big difference in protecting your home from moisture-related damage.
Start by considering liquid membranes, which form a seamless barrier on walls and floors, effectively preventing water intrusion.
Sealants are another great choice, offering flexibility that adapts to structural movements, reducing the risk of cracks and leaks.
Cementitious coatings are robust solutions, perfect for areas exposed to constant water pressure. These coatings bond well to concrete and masonry surfaces, offering long-lasting protection against flood damage.
Don’t overlook waterproof insulation materials like closed-cell foam, which not only guard against water damage but also enhance energy efficiency.
These materials are key to keeping your home safe and dry, minimizing moisture-related damage.
While guaranteeing your home stays dry and protected from future water intrusion, focusing on effective drainage and waterproofing solutions is essential.
By taking proactive steps, you can mitigate the risk of flood damage and potentially lower your insurance costs. Consider these strategies:
Effective maintenance and preparation keep your home safe and dry.
Rebuilding after a flood is like crafting a masterpiece from chaos. You’re not just restoring walls and floors; you’re creating a resilient future. By evaluating damage, hiring restoration experts, removing damaged materials, guaranteeing thorough drying, and reviewing systems, you lay a strong foundation. Planning durable renovations and implementing drainage solutions guarantees you’re prepared for the next storm. Stay focused, proactive, and informed, and you’ll transform disaster’s aftermath into a demonstration of strength and foresight.
When tackling DIY mold removal, remember to wear N95 masks, gloves, and goggles for protection. Don’t create airborne spores by using fans in moldy areas. Opt for natural cleaners like vinegar or baking soda for safe results, and avoid mixing bleach with other cleaners to prevent toxic fumes. Contain the work area with plastic sheeting to stop spore spread and dry surfaces thoroughly afterward. Discover more about safeguarding your space effectively.
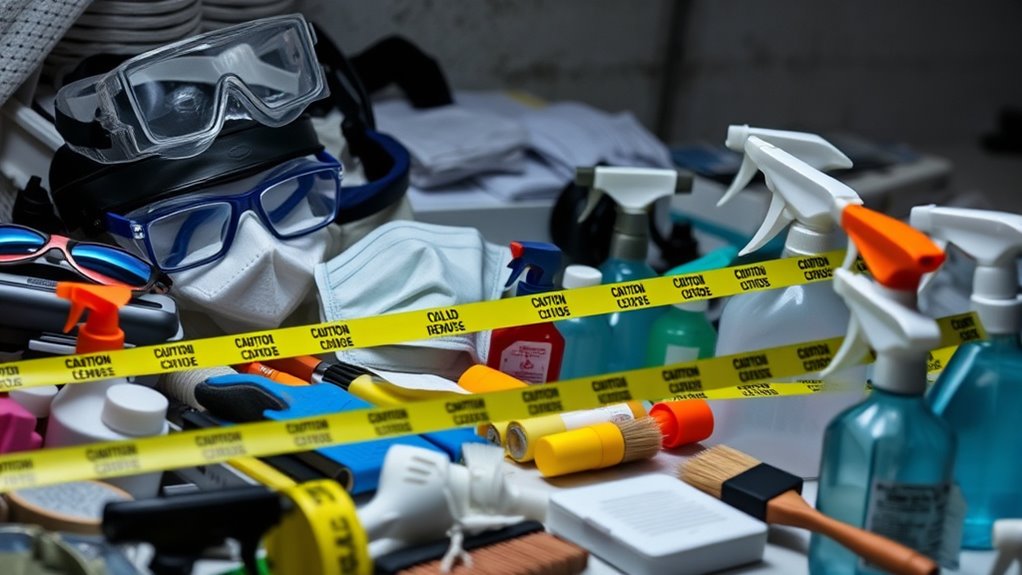
When removing mold from your home, it’s essential to prioritize safety to protect yourself and others.
Start by wearing personal protective equipment like N95 masks, rubber gloves, and goggles to prevent inhaling mold spores and contact with your skin and eyes. Guarantee proper ventilation in the work area, but avoid using fans that might disturb mold.
Use plastic sheeting to contain the work area, preventing spores from spreading. Take care not to disturb mold, as it releases mycotoxins and spores, posing health risks.
Dispose of contaminated materials by placing them in sealed bags to prevent cross-contamination. Avoid inhaling any spores or fumes from cleaning solutions, maintaining a safe environment for everyone involved in the mold removal process.
When tackling mold in your home, you can choose between natural solutions like undiluted white vinegar and baking soda, or commercial mold removal products for a more potent approach.
Natural options are effective and safe for most surfaces, while commercial products often provide faster results but may require more safety precautions.
Consider the surface type and mold severity to decide which solution will work best for you, always ensuring proper ventilation during the cleaning process.
While tackling mold issues in your home, it’s beneficial to explore natural cleaning options that are both effective and eco-friendly.
Undiluted white vinegar serves as a powerful natural mold cleaner, tackling up to 82% of mold species. Spray it directly on surfaces, let it sit, then scrub for effective mold removal.
Hydrogen peroxide is another excellent choice; use a 3% solution to kill mold and maintain hygienic surfaces.
Tea tree oil mixed with water works wonders not only for mold prevention but also leaves a pleasant scent. These cleaning products address hygiene issues effectively.
Baking soda is great too—it absorbs moisture, preventing future growth.
Dealing with mold is never pleasant, but commercial mold removal products offer powerful solutions that can make the task more manageable.
These products often contain strong fungicides to kill mold on contact, making them effective for cleaning mold on tiles and other non-porous surfaces.
However, they may not penetrate porous materials like wood, where mold can return if not fully addressed.
For those concerned about harsh chemicals, eco-friendly mold removers with natural ingredients like tea tree oil are available. They eliminate mold effectively while reducing health problems.
Always read labels for proper usage and follow safety guidelines—wear protective gear like gloves, goggles, and masks.
Address any moisture issues first to prevent mold from returning and guarantee a mold-free environment.
To effectively tackle mold issues, it’s important to first identify and address the sources of moisture that encourage its growth.
Mold thrives in humid environments, so checking for leaks and poor ventilation is essential. Common areas prone to moisture include basements, bathrooms, kitchens, and around windows or pipes. Addressing these issues helps prevent mold growth.
Fix plumbing leaks promptly and make certain roofs are intact to reduce moisture levels. Installing dehumidifiers can help maintain indoor humidity levels below 60%, which is crucial for preventing mold problems. Additionally, timely restoration of water damage is critical in minimizing long-term issues such as mold growth.
Regular cleaning and inspections, especially after heavy rainfall, can reveal signs of dampness or water intrusion. By addressing moisture sources, you can effectively prevent mold issues before they become significant problems.
Mold can be a stubborn nuisance, but with the right techniques, you can effectively remove it from various surfaces in your home.
Start by addressing black mold on hard, non-porous surfaces with a bleach solution—one cup of bleach per gallon of water. Let it sit to kill the spores.
For porous materials like drywall, gently scrub the affected area using a detergent and water solution. In damp environments, use undiluted white vinegar, allowing it to penetrate for 15 minutes before scrubbing.
To prevent mold, dry the area thoroughly with fans or a dehumidifier. On wood, sand first, then clean with a HEPA vacuum.
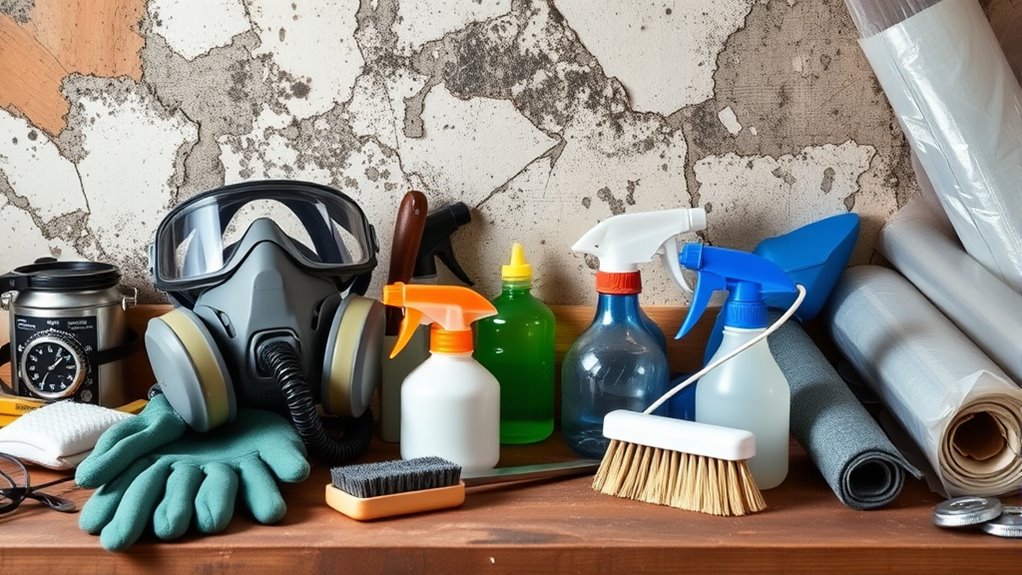
When tackling mold removal, having the right tools and gear is crucial for both effectiveness and safety.
Start by equipping yourself with rubber gloves and protective eyewear to shield your skin and eyes from mold spores. A scrub brush and cleaning cloths are necessary for scrubbing affected areas and wiping away residues.
To prevent mold spores from spreading, use a vacuum with a HEPA filter. Don’t forget N95 masks to avoid inhaling spores.
Prepare effective cleaning solutions using dish soap, white vinegar, or baking soda. These natural ingredients combat mold without harsh chemicals. A spray bottle guarantees even coverage of these solutions.
Equipped with these tools and gear, you’re set to tackle mold removal confidently and safely.
When tackling mold remediation, it’s essential to wear proper protective gear like N95 masks, gloves, and goggles to shield yourself from harmful spores.
Be cautious with cleaning products; mixing bleach with ammonia or other cleaners can create dangerous fumes that threaten your health.
Additionally, make sure you’re not spreading mold spores by using fans in affected areas, as this can exacerbate the problem instead of containing it.
Although tackling mold removal yourself can be challenging, equipping yourself with the right protective gear is essential for your safety and success.
To minimize exposure to mold spores and prevent health risks, always wear appropriate personal protective equipment (PPE). Here’s what you need:
Finally, change out of contaminated clothing and wash separately to keep mold confined.
To guarantee safe and effective mold removal, understanding the precautions for using cleaning products is essential.
In DIY mold remediation, always wear protective gear like gloves and masks to minimize health risks.
When tackling black mold, avoid mixing bleach with ammonia; this toxic combo can harm your health.
Use a bleach solution on non-porous surfaces, mixing 1 cup of bleach with 1 gallon of water, and don’t rinse it off to ensure effectiveness.
For porous surfaces, a 50/50 ammonia-water solution can help, but remember to rinse after 2-3 hours.
As a natural mold killer, undiluted white vinegar is effective on hard surfaces, eliminating 82% of mold species.
Following these cleaning product precautions ensures a safer mold removal process.
If you’re aiming to prevent mold from making a comeback in your home, focusing on controlling humidity is key.
First, remove excess moisture by maintaining indoor humidity below 60%. Use dehumidifiers and guarantee proper ventilation, especially in bathrooms and kitchens.
Second, regularly inspect and repair leaks from plumbing, roofs, or windows to avoid moisture buildup. This practice will considerably enhance air quality and prevent mold growth.
Third, clean and dry any wet surfaces within 24 to 48 hours, making sure mold spores don’t settle and multiply.
Finally, consider using mold-resistant paints and treatments in high-moisture areas, making your home an inhospitable environment for mold.
Here’s a quick checklist:
Tackling mold removal is like steering a ship through stormy waters—armed with the right tools and knowledge, you’ll reach clear skies. Prioritize safety, use effective cleaning solutions, and address mold at its source. Equip yourself with the right gear and avoid common pitfalls. By following these guidelines, you not only remove existing mold but also prevent its return, ensuring a healthier environment. Your diligence today lays the groundwork for a mold-free tomorrow.